FCM APNS 환경설정 가이드(AOS)
개요
Firebase Cloud Messaging(FCM)은 구글이 제공하는 메시징 서비스로, 앱 서버와 클라이언트 앱 간의 메시지를 전송할 수 있게 한다. 이를 통해 실시간 알림이나 데이터 동기화를 간편하게 구현할 수 있다.
메세지 유형
알림 메시지
데이터 메시지
FCM의 동작 흐름
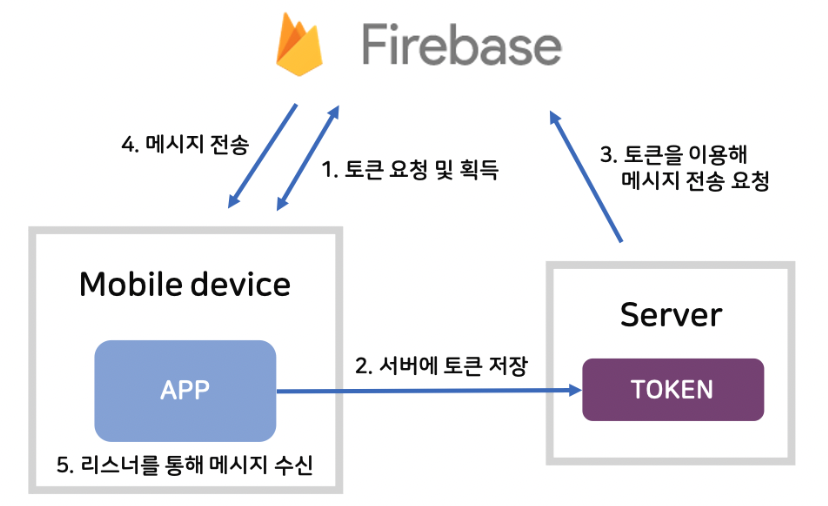
토큰 요청 및 획득
사용자가 앱을 설치하고 최초 실행 시, Firebase 클라우드 메시징 서비스는 앱 인스턴스를 위한 고유한 토큰을 생성한다.서버에 토큰 저장
획득한 토큰을 앱 서버로 전송하여 서버의 데이터베이스에 저장 (이 토큰은 특정 사용자에게 메시지를 전송할 때 사용)토큰을 이용해 메시지 전송 요청
서버에서 클라우드로 메시지 데이터와 함께 토큰을 보내 전송을 요청메시지 전송
FCM 클라우드 서버는 요청받은 메시지를 해당 토큰과 연결된 장치로 전송(메시지는 알림 메시지 또는 데이터 메시지 형태로 전송 할 수 있음)리스너를 통해 메시지 수신
앱이 실행 중이 아니더라도, FCM은 메시지를 수신하고 처리할 수 있다.
구현
구현 내용
Firebase 설정
FirebaseMessagingService 구현
메시지 전송
Firebase 설정
프로젝트 생성
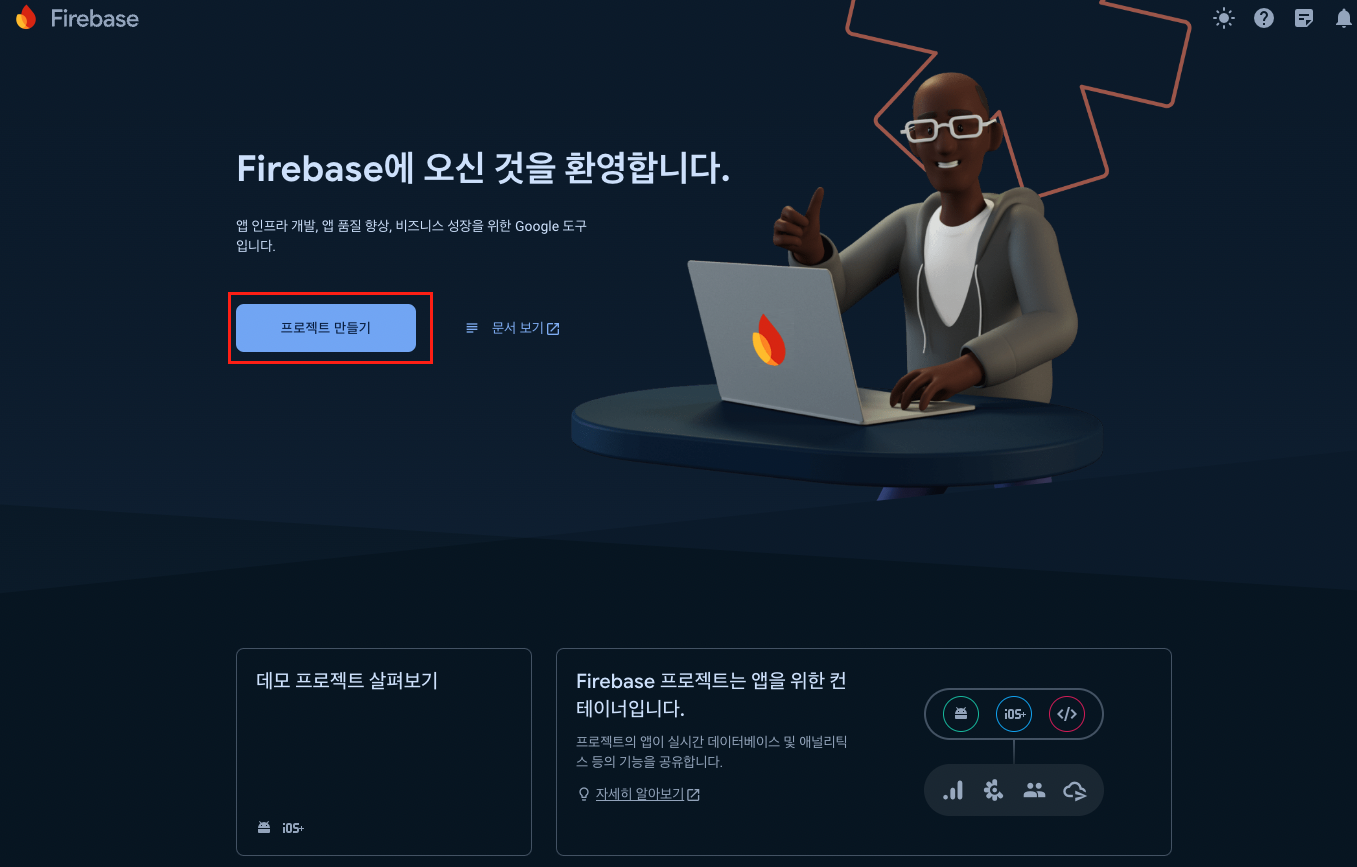
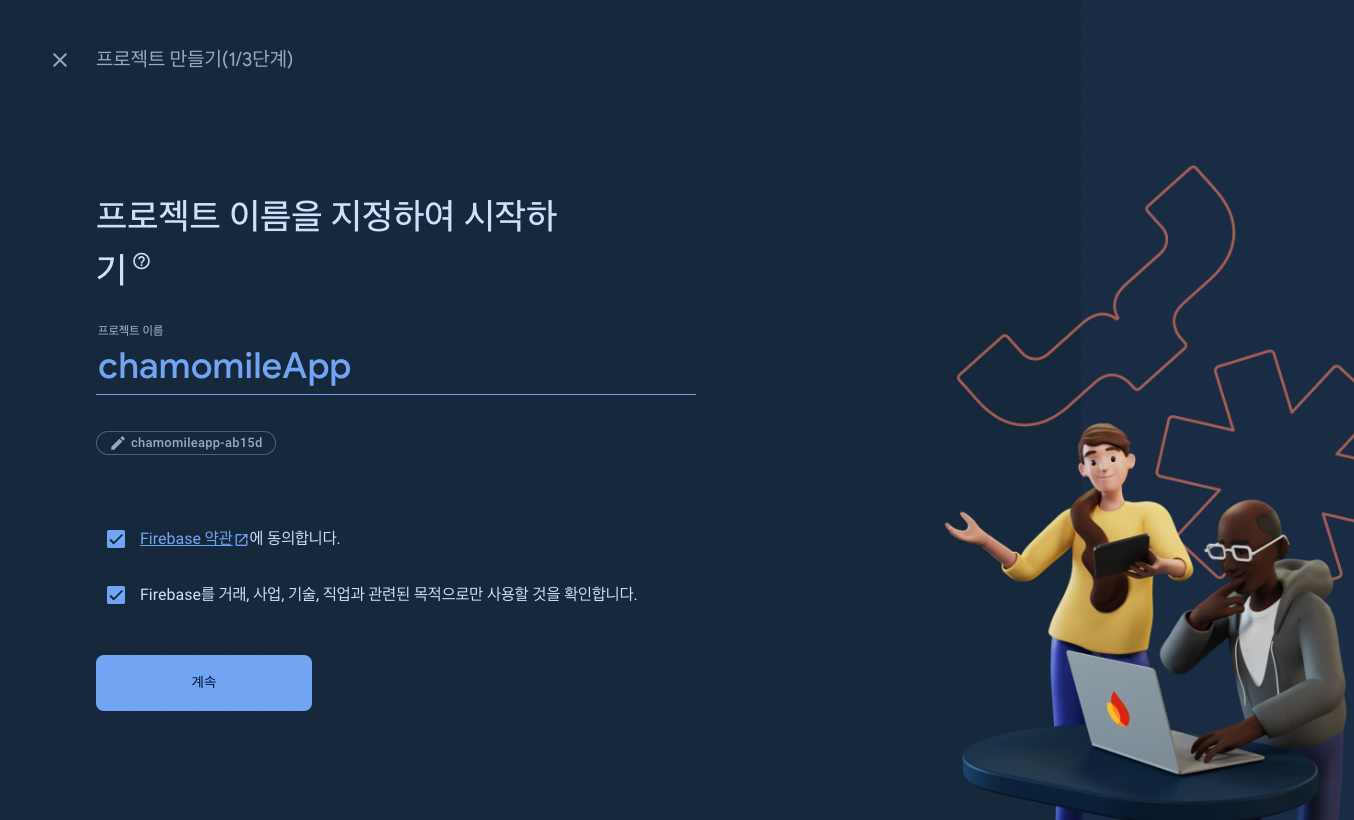
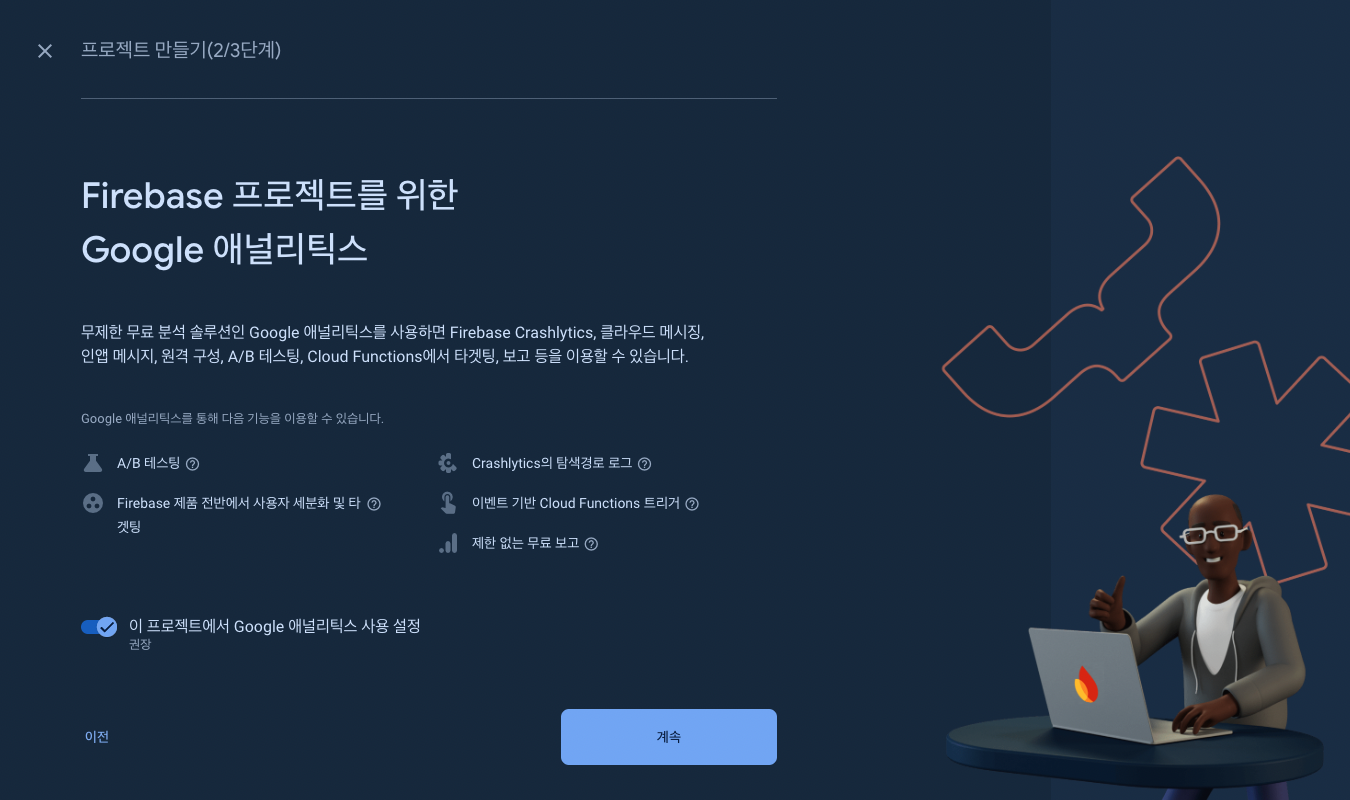
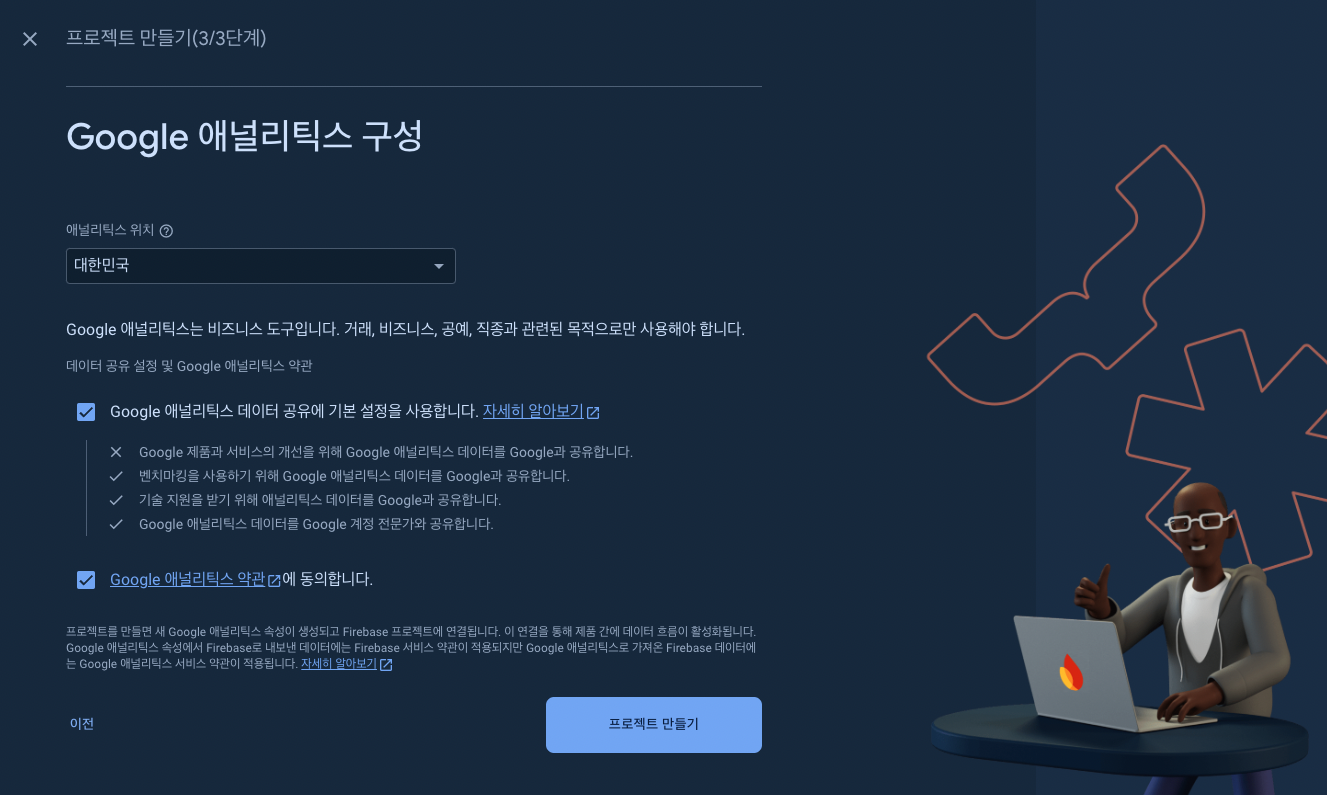
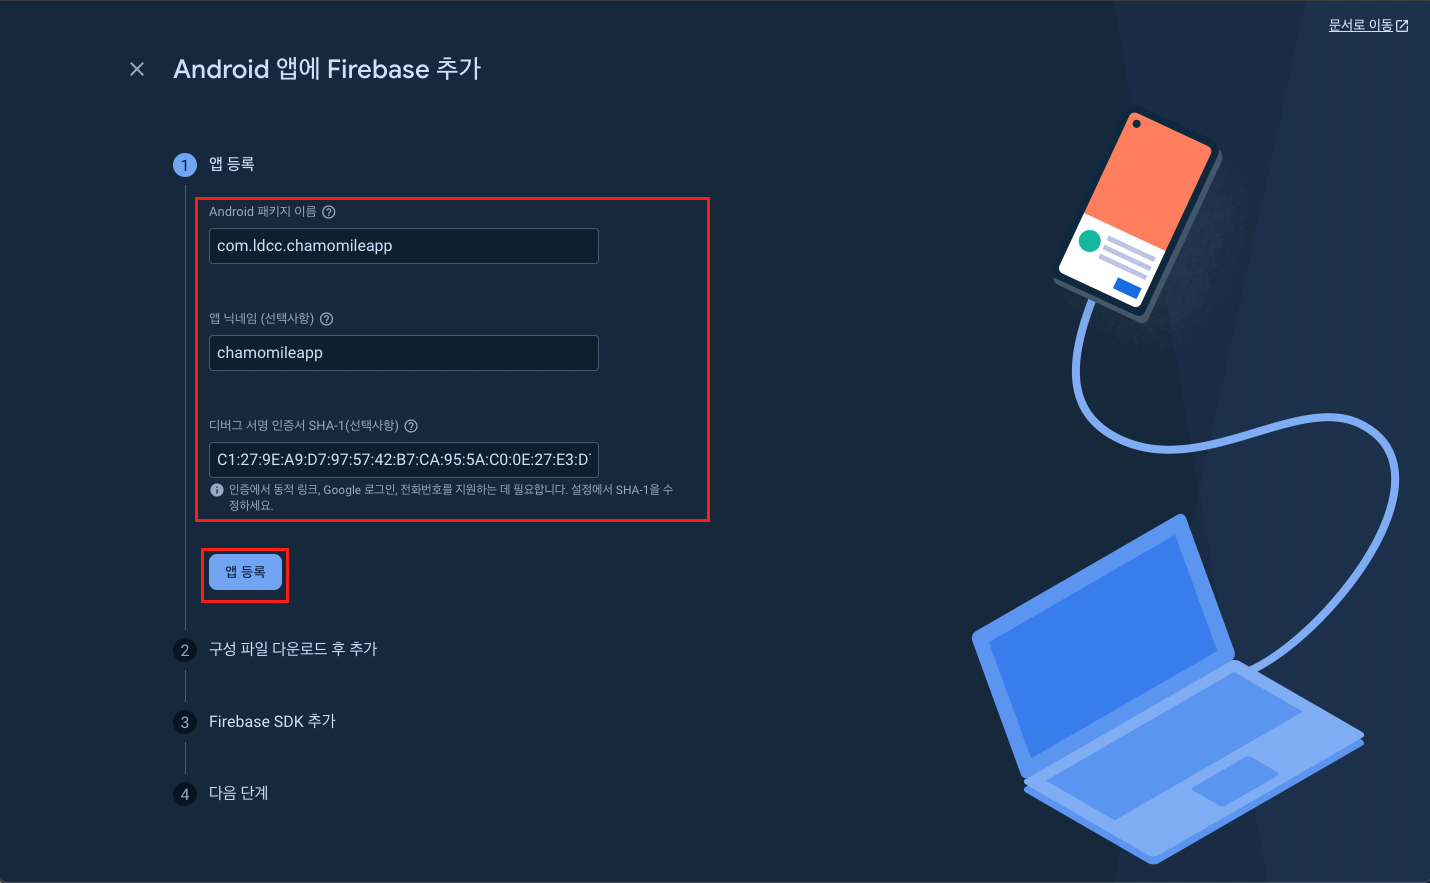
생성된 프로젝트에 앱을 추가
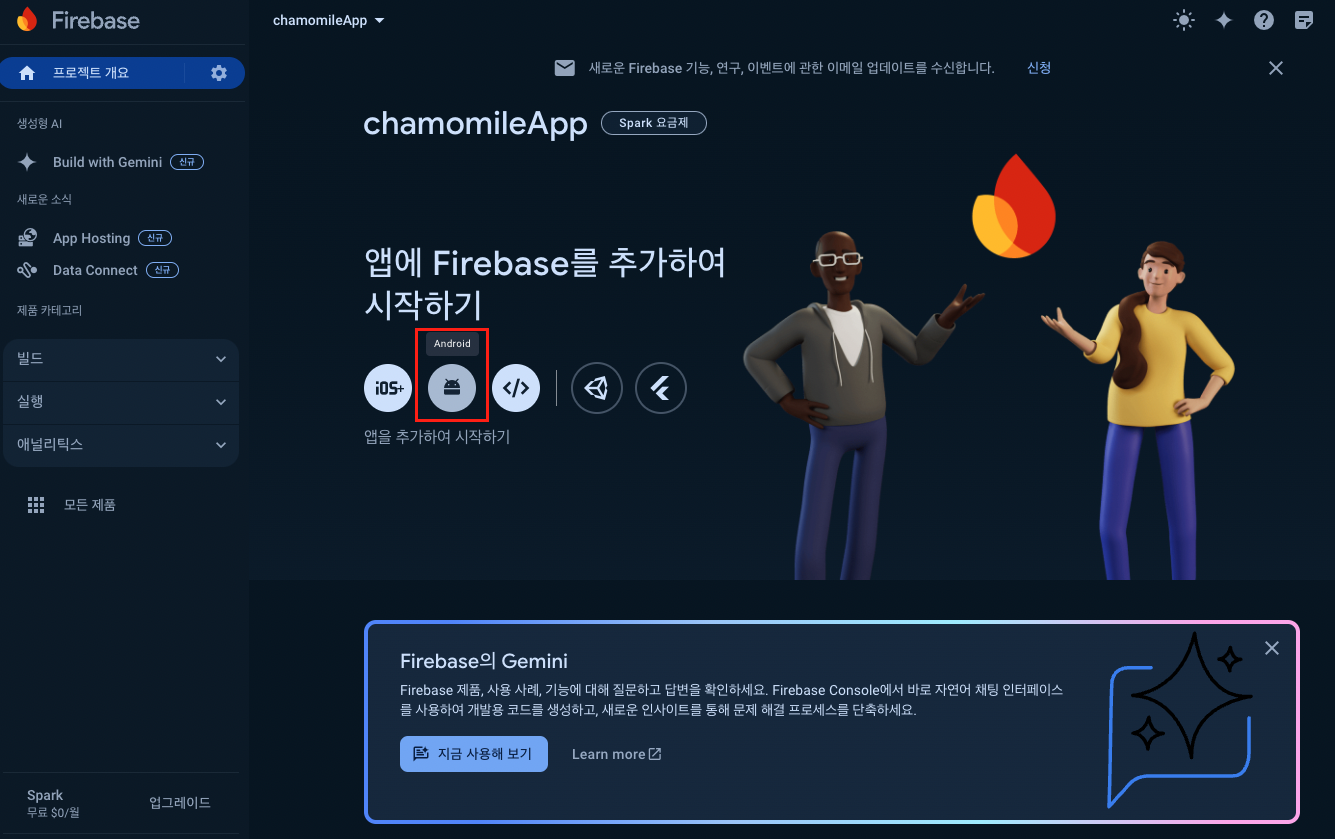
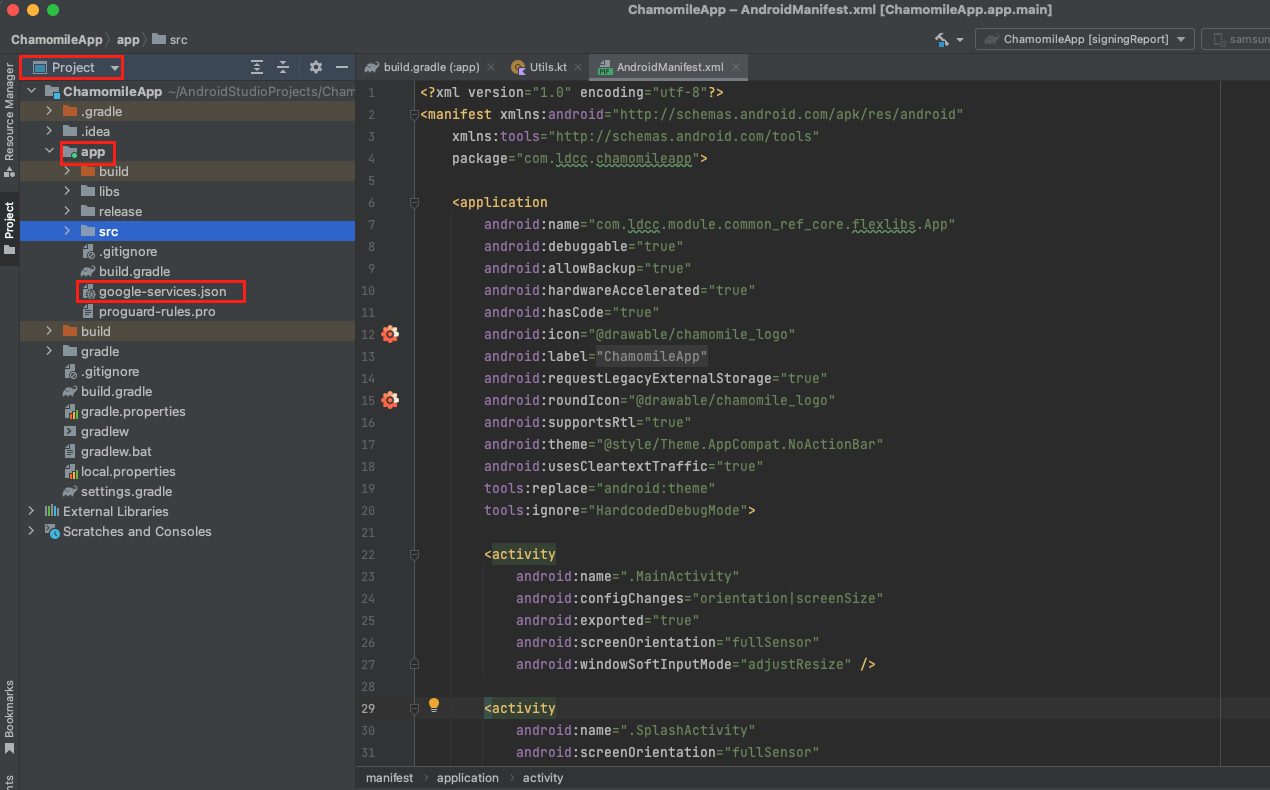
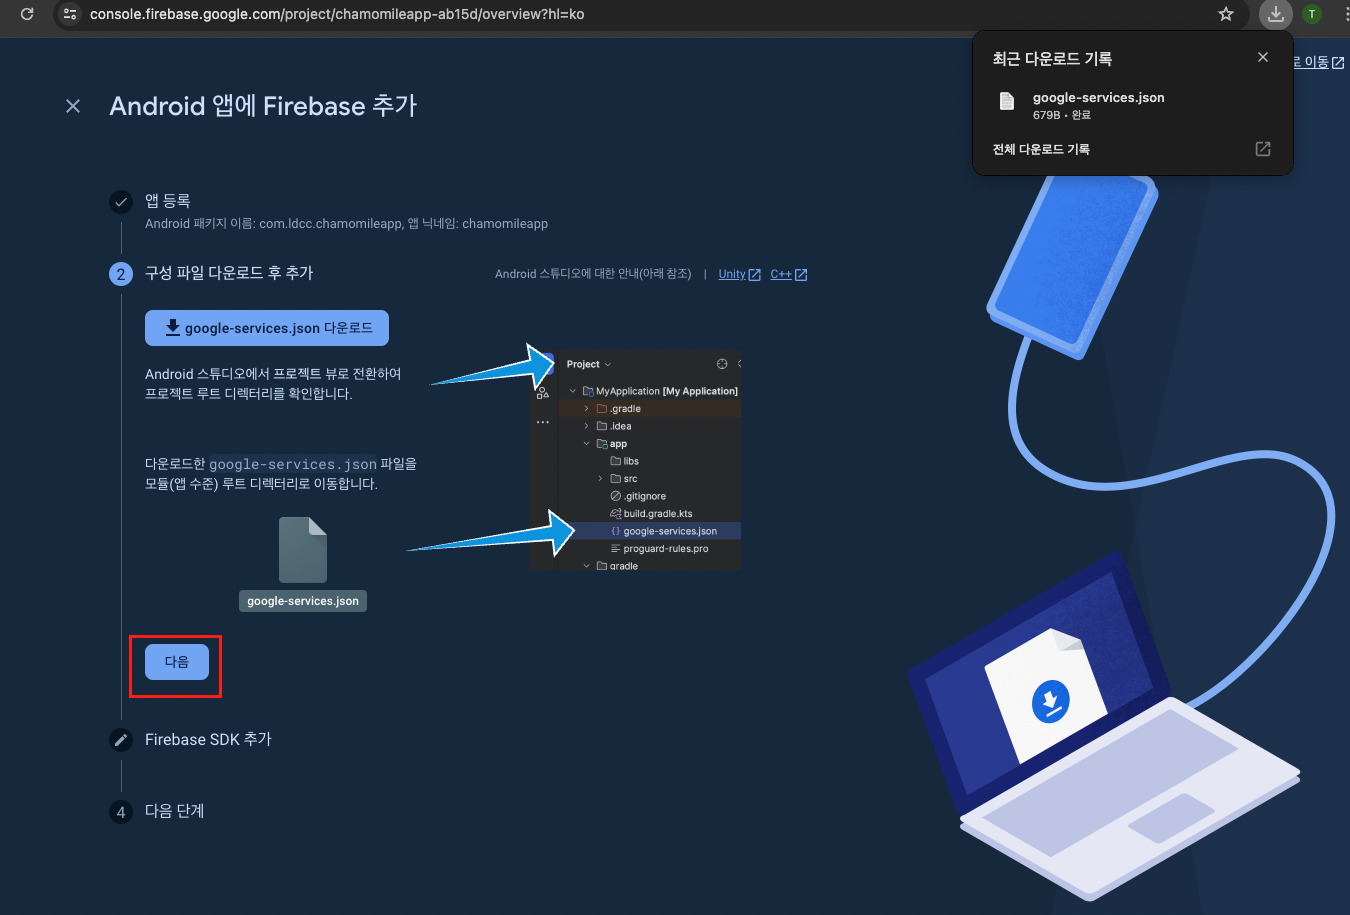
google-services.json 파일 다운로드 후 프로젝트에 삽입

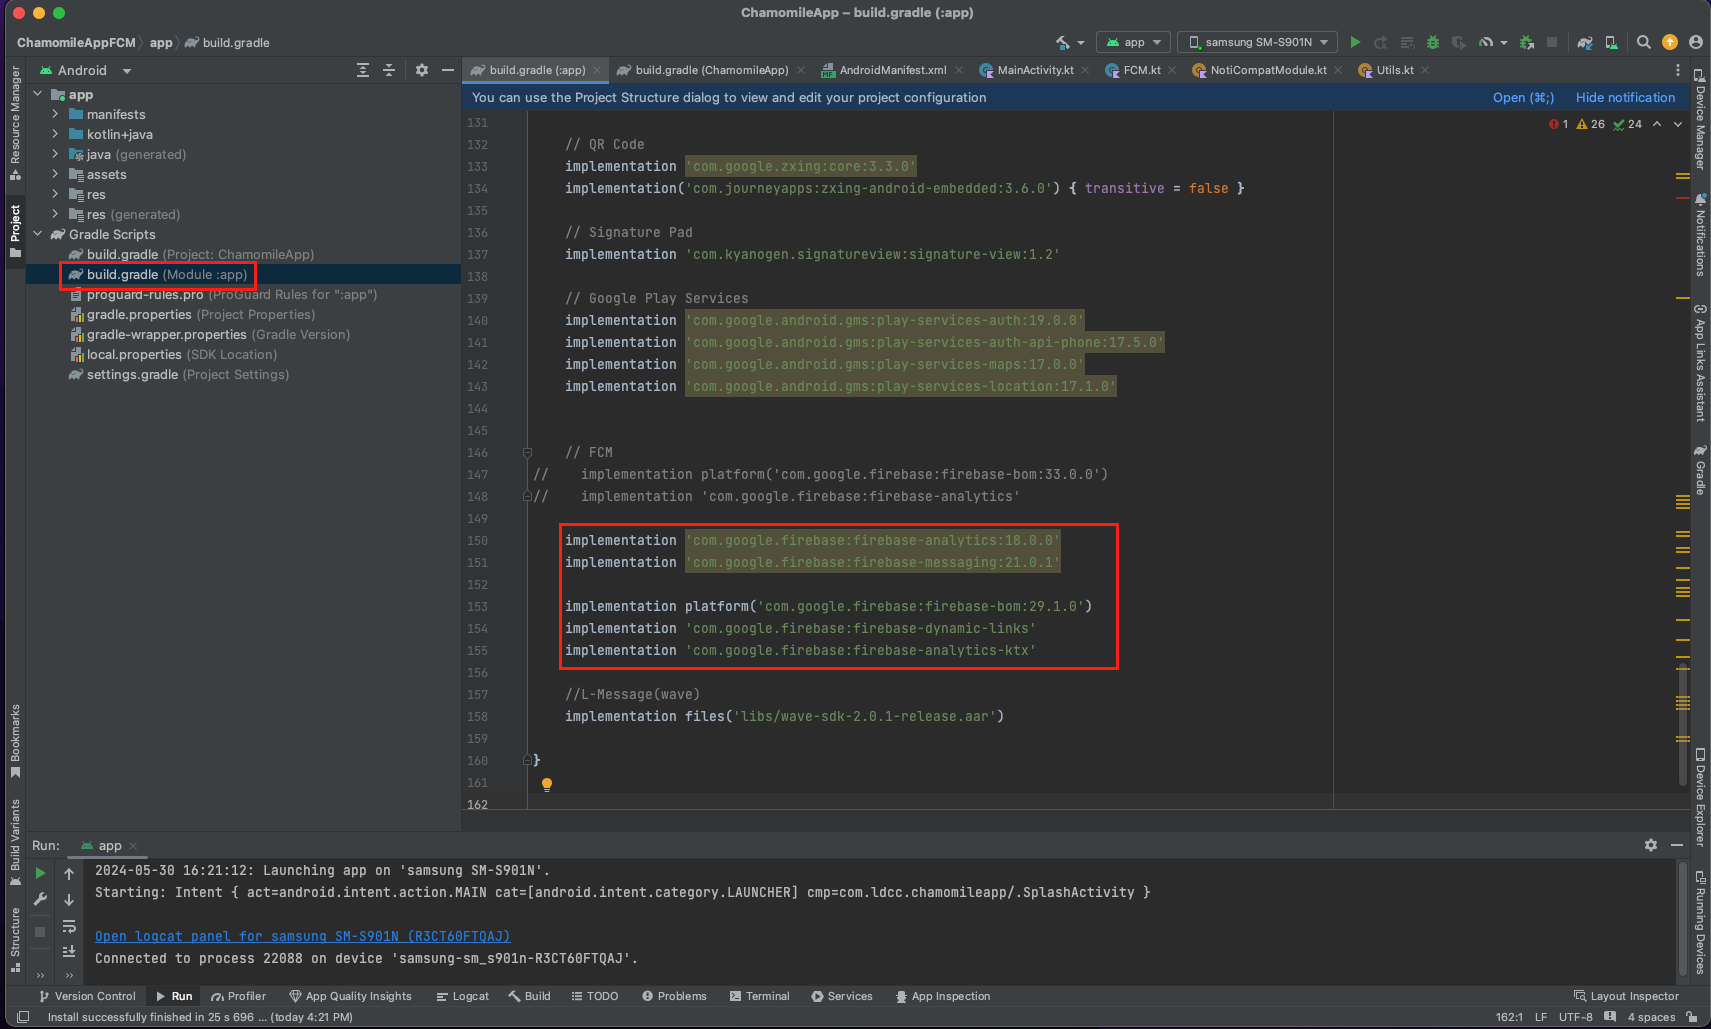
Firebase SDK 추가 최신 버전의 SDK가 아닌, 캐모마일 프레임워크에 맞는 SDK버전을 사용. 아래와 같이 build.gradle에 SDK 설정 코드를 추가한다.
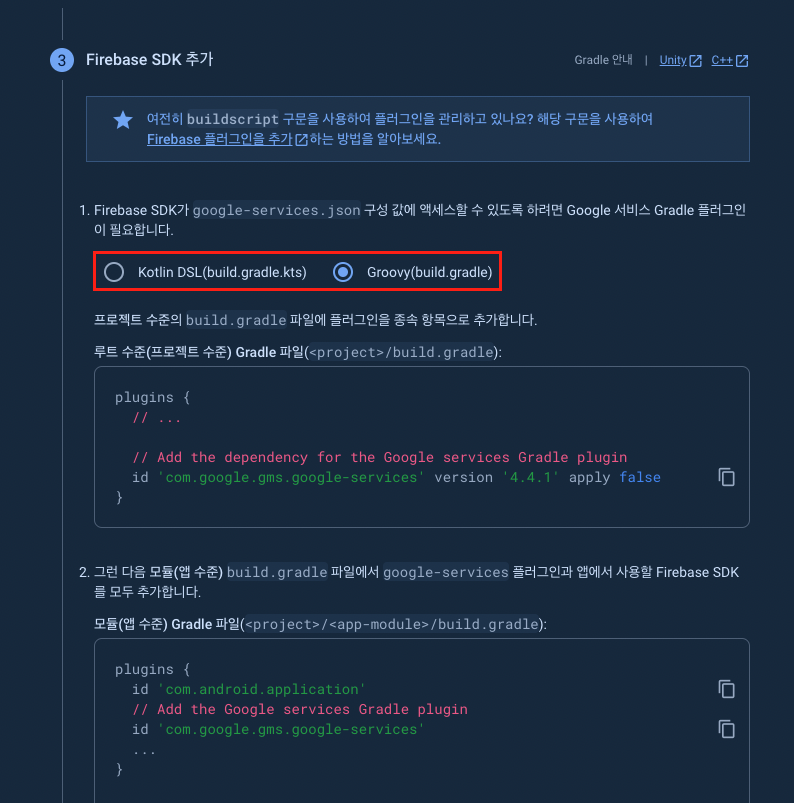 classpath 'com.google.gms:google-services:4.3.4'
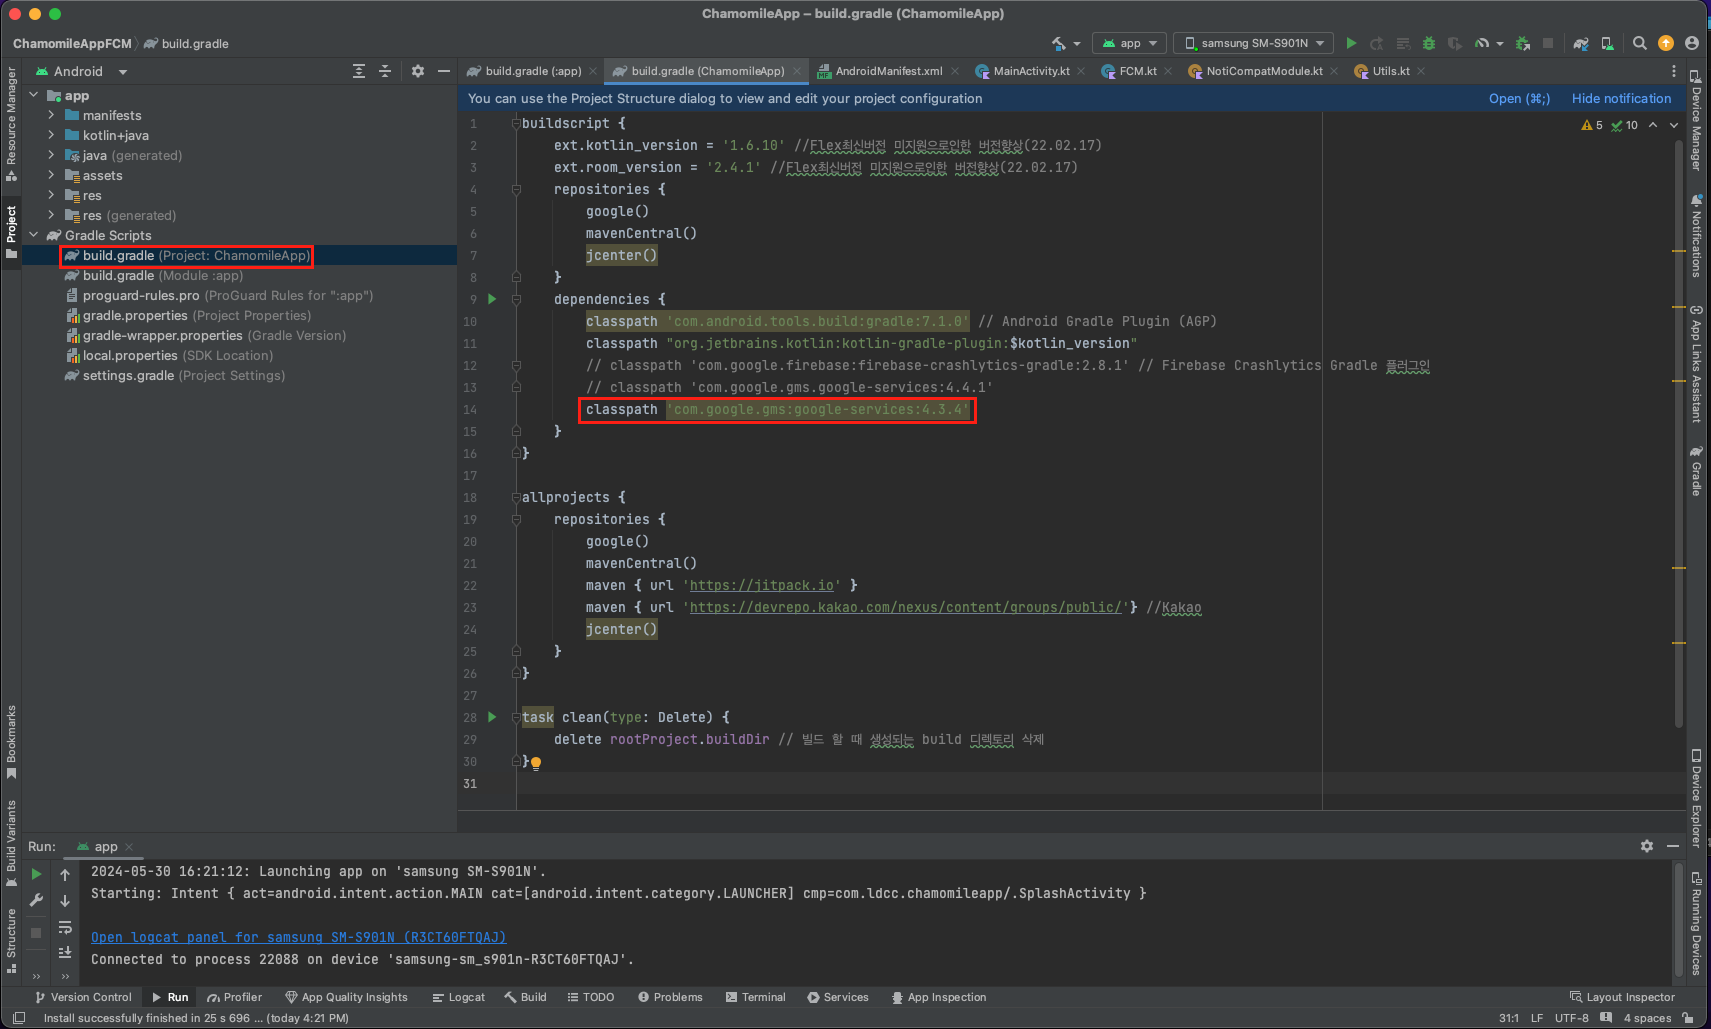
build.gradle (Module-Level)
apply plugin: 'com.google.gms.google-services' implementation 'com.google.firebase:firebase-analytics:18.0.0' implementation 'com.google.firebase:firebase-messaging:21.0.1' implementation platform('com.google.firebase:firebase-bom:29.1.0') implementation 'com.google.firebase:firebase-dynamic-links' implementation 'com.google.firebase:firebase-analytics-ktx'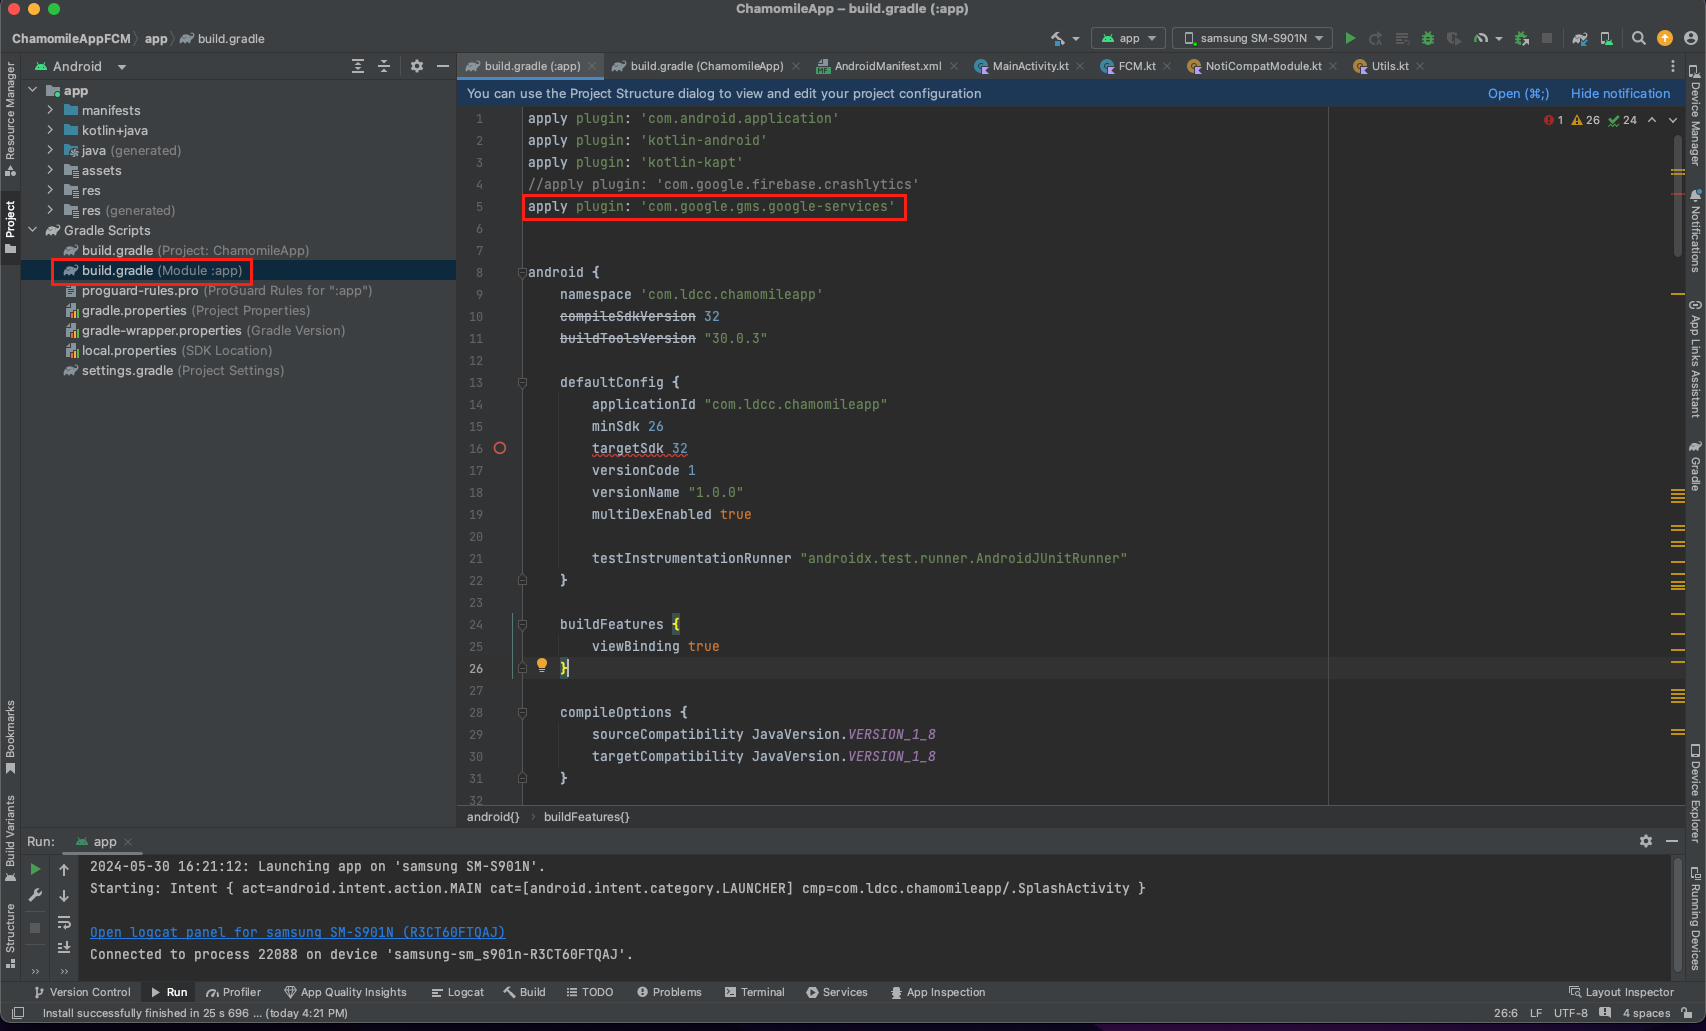
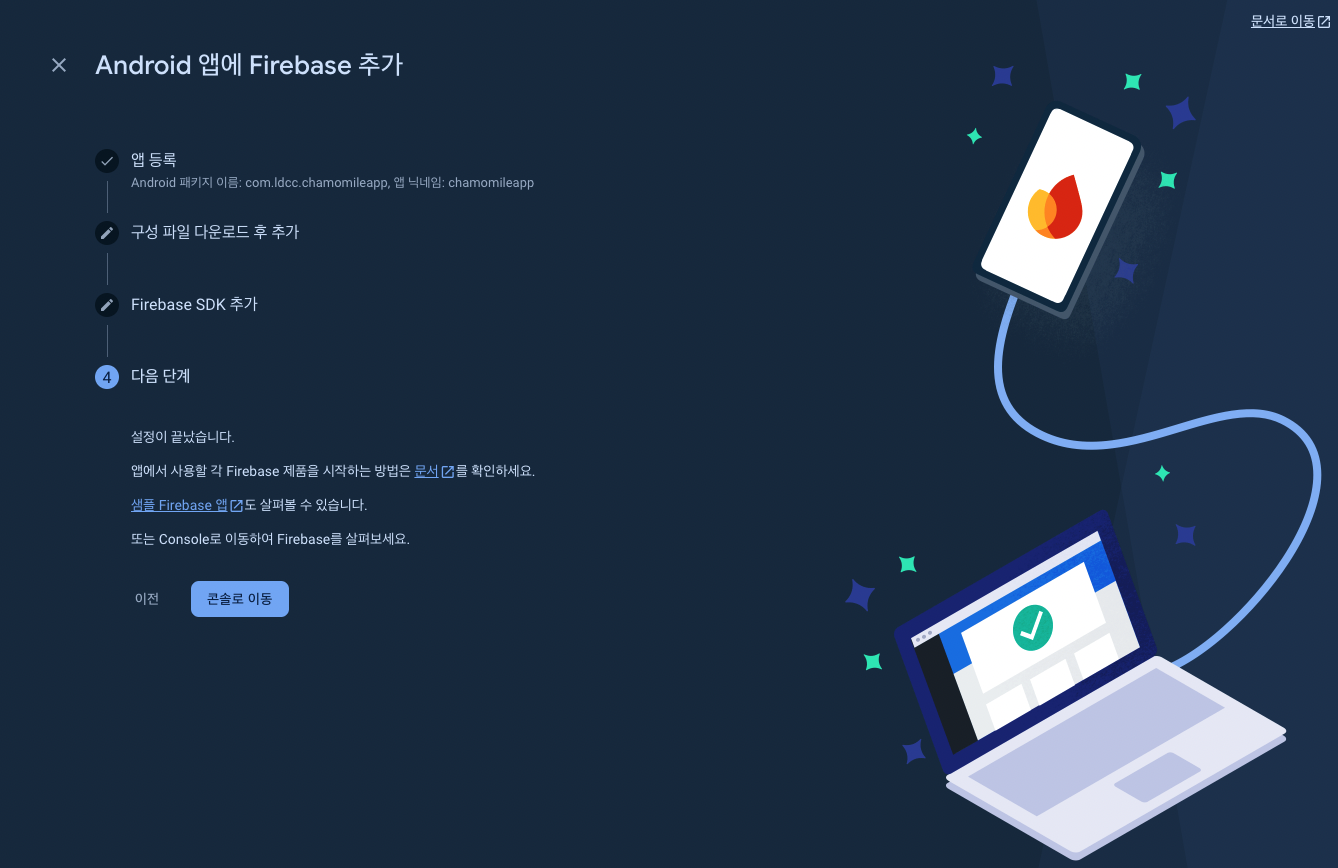
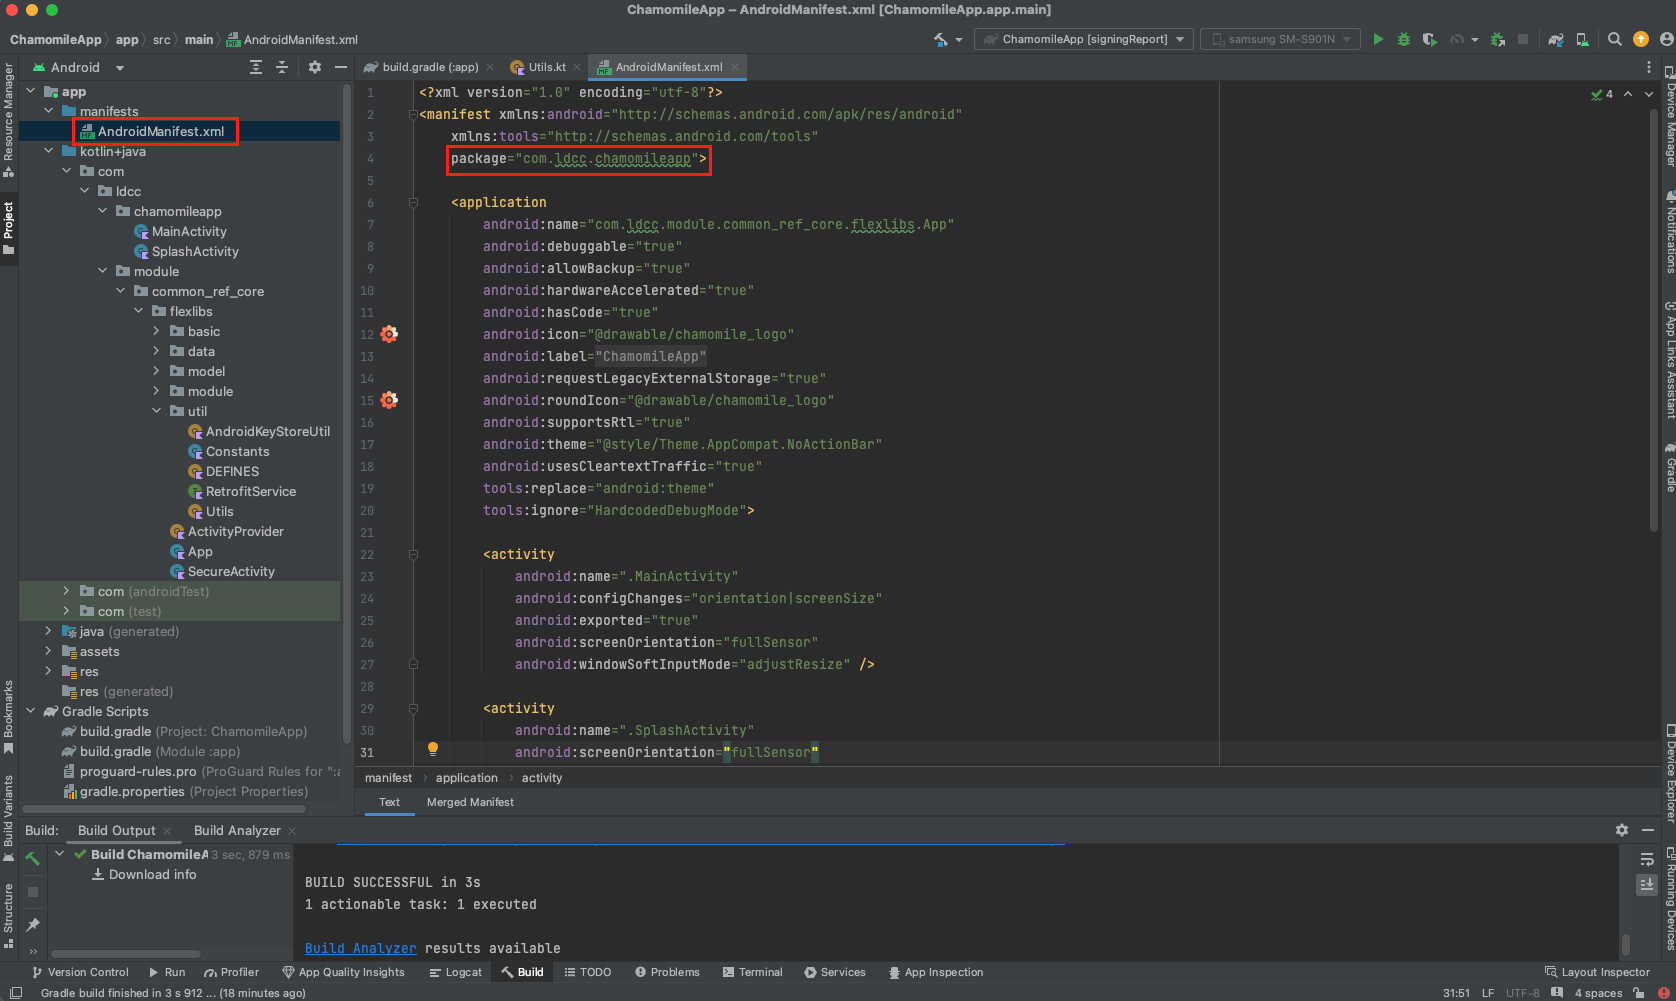
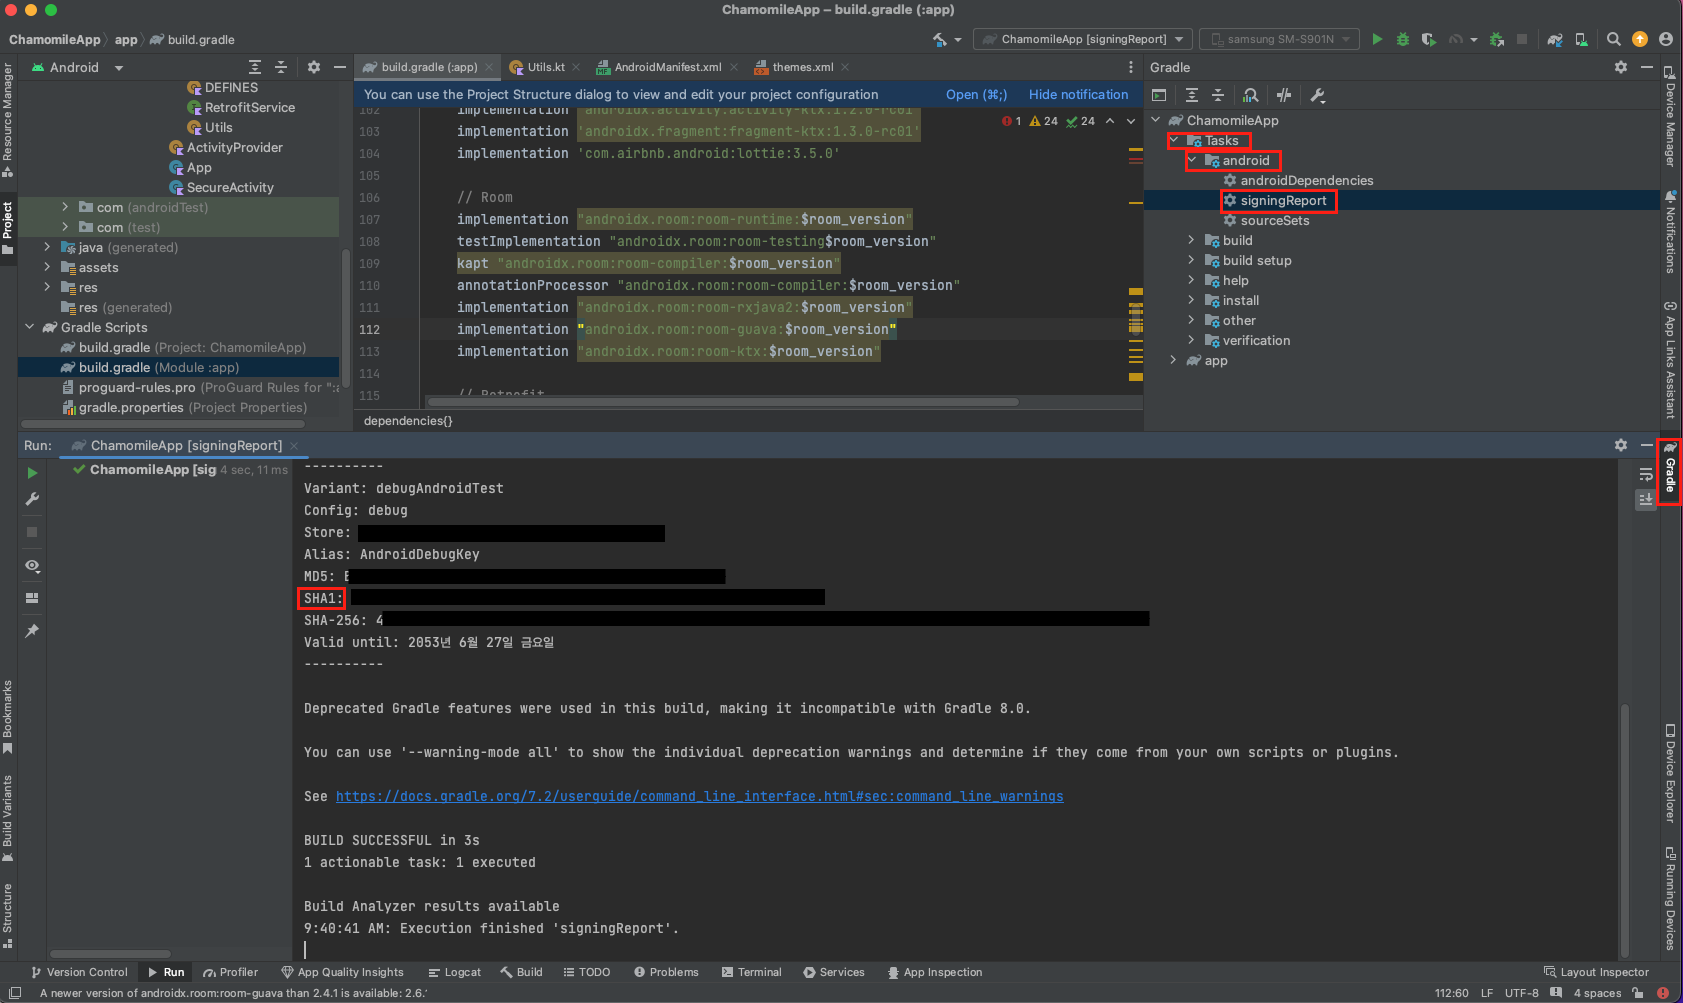
앱정보를 확인하는 방법
FirebaseMessagingService 구현
Androlid13 이상에서는 런타임 알림 권한(android.permission.POST_NOTIFICATIONS)을 요청해줘야한다. 앱 실행시 알람권한을 체크하도록 설정.
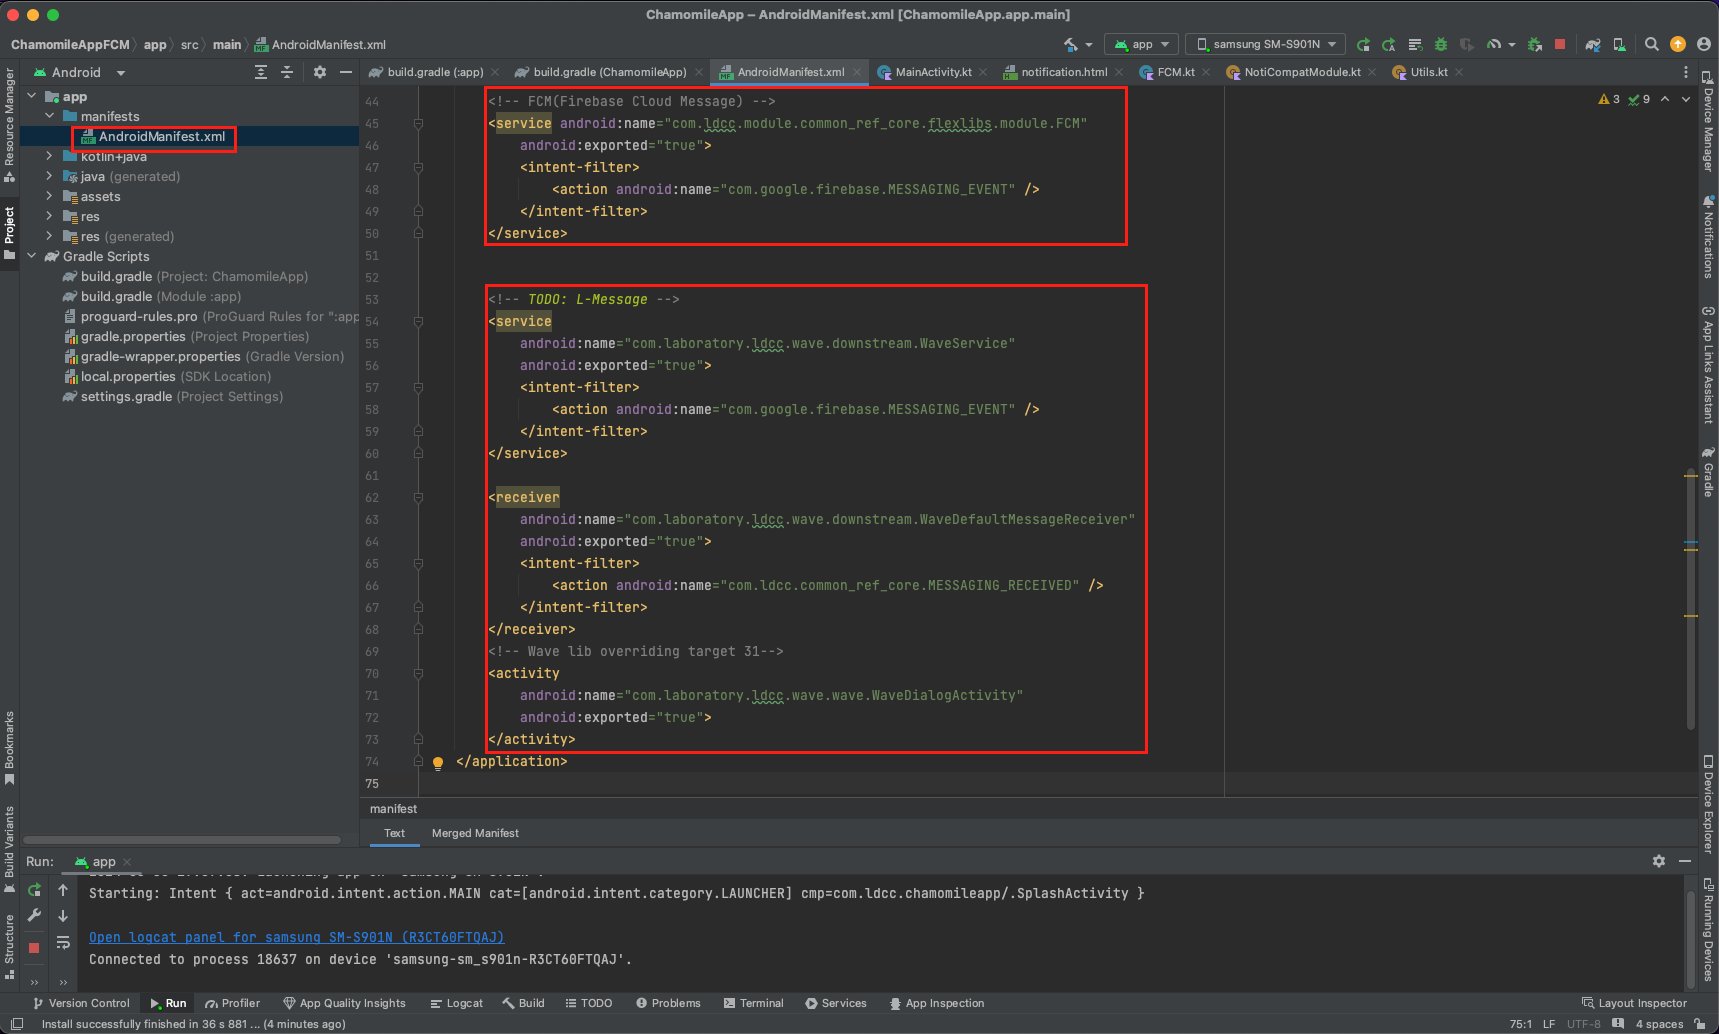
현재 프레임워크에서는 FCM이 L-Message의 일부 기능을 사용하고 있기때문에, L-Message 라이브러리를 추가해준다.
AndroidManifest.xml 설정
<uses-permission android:name="android.permission.INTERNET" /> <uses-permission android:name="android.permission.POST_NOTIFICATIONS" /> <!-- FCM(Firebase Cloud Message) --> <service android:name="com.ldcc.module.common_ref_core.flexlibs.module.FCM" android:exported="true"> <intent-filter> <action android:name="com.google.firebase.MESSAGING_EVENT" /> </intent-filter> </service> <!-- L-Message --> <service android:name="com.laboratory.ldcc.wave.downstream.WaveService" android:exported="true"> <intent-filter> <action android:name="com.google.firebase.MESSAGING_EVENT" /> </intent-filter> </service> <receiver android:name="com.laboratory.ldcc.wave.downstream.WaveDefaultMessageReceiver" android:exported="true"> <intent-filter> <action android:name="com.ldcc.common_ref_core.MESSAGING_RECEIVED" /> </intent-filter> </receiver> <!-- Wave lib overriding target 31--> <activity android:name="com.laboratory.ldcc.wave.wave.WaveDialogActivity" android:exported="true"> </activity>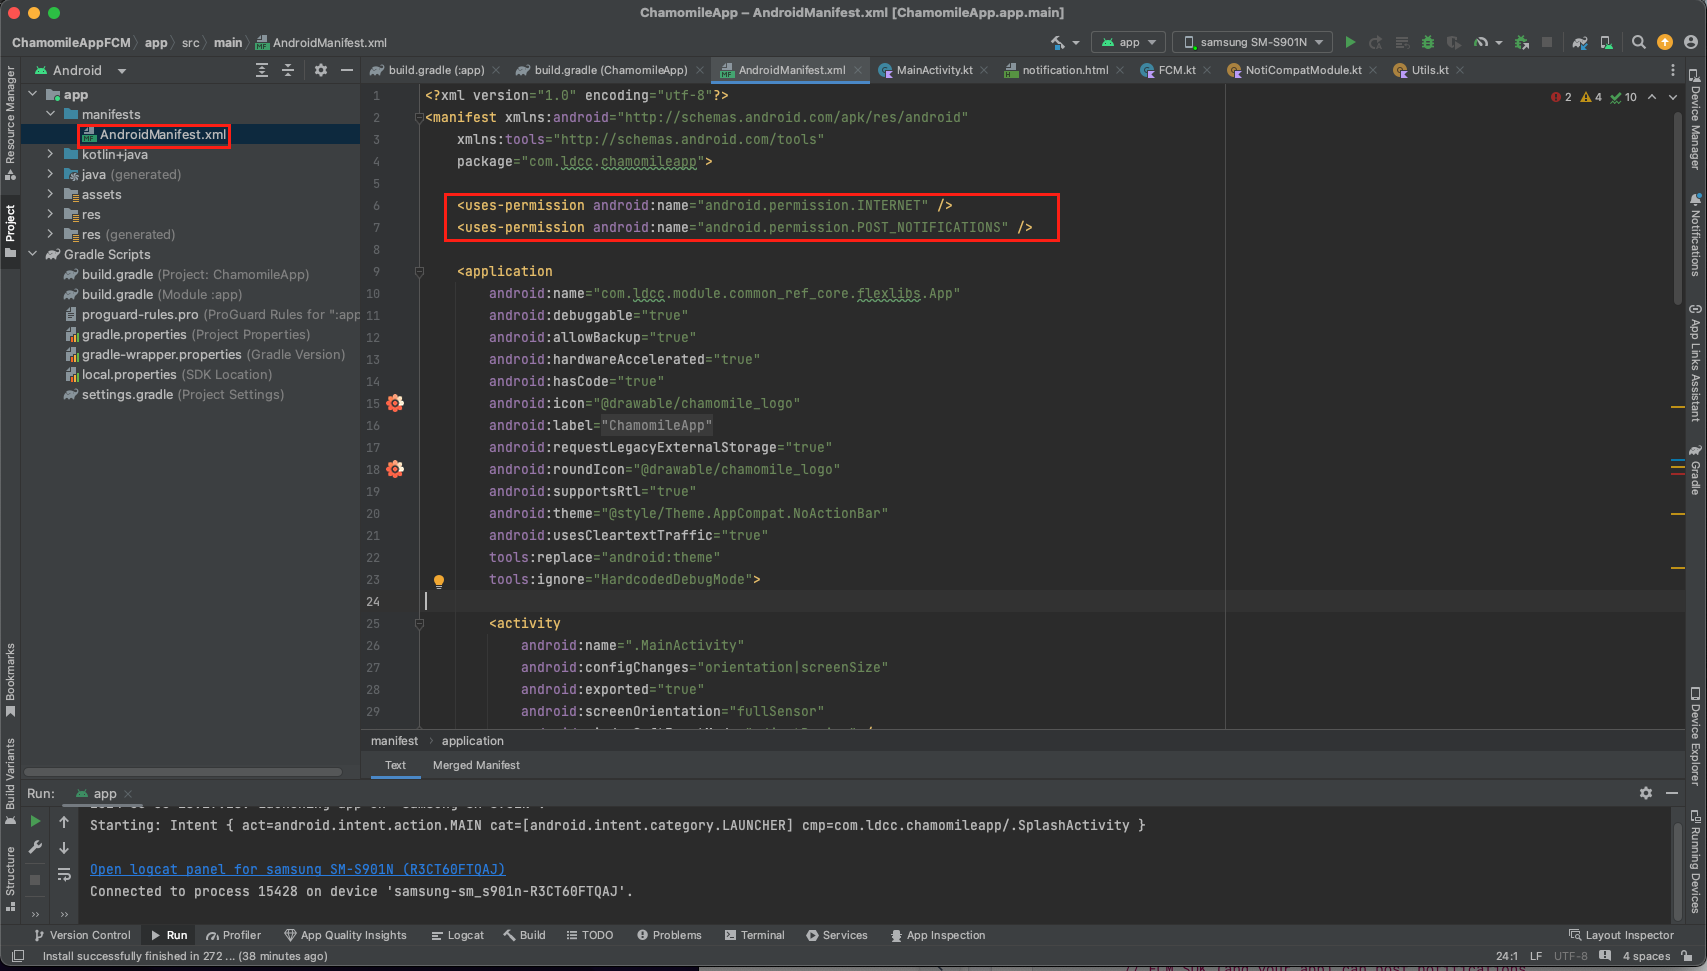
L-Message(wave) 라이브러리 추가
lib폴더에 wave-sdk-2.0.1-release.aar 파일을 삽입한다.
app수준의 build.gradle에 아래와 같은 dependencies를 추가한다.
//L-Message(wave) implementation files('libs/wave-sdk-2.0.1-release.aar')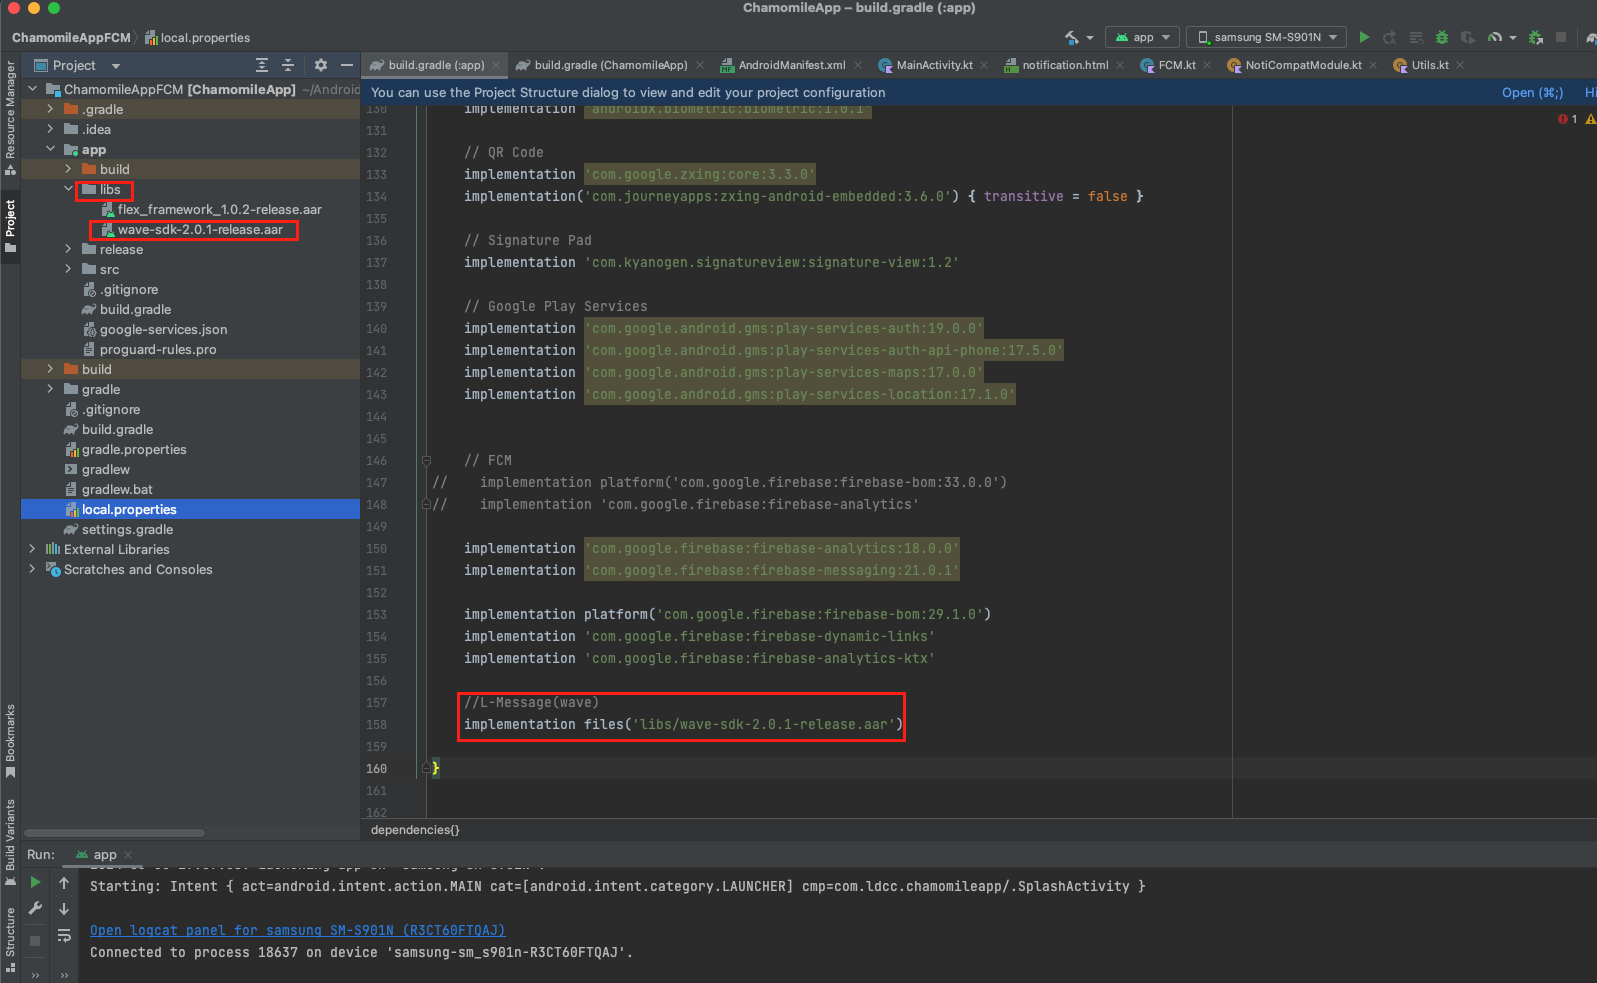
FCM 모듈 구현 다음과 같이 코드를 구현해준다.
onNewToken - 새로 갱신된 토큰을 저장
onMessageReceived - FCM 메시지를 수신했을 때 알림을 생성
getFirebaseToken - 현재 등록된 FCM 토큰을 가져와서 저장
class FCM: FirebaseMessagingService() { override fun onNewToken(token: String) { Utils.LOGD("Call onNewToken() in FCM class.") Utils.LOGD("Token: $token") try{ val var10000 = WaveInfoDBHelper(ActivityProvider.mainActivity, "deviceInfo.db", null as SQLiteDatabase.CursorFactory?, 1) var10000.putFcmToken(token) }catch (e: Exception){ e.printStackTrace() } } override fun onMessageReceived(remoteMessage: RemoteMessage) { if(remoteMessage.notification != null) { val channelId = getString(R.string.noti_channel_id) val channelName = getString(R.string.noti_channel_name) val description = getString(R.string.noti_desc) val importance = Constants.NOTI_DEFAULT if (Build.VERSION.SDK_INT >= Build.VERSION_CODES.O) { NotiCompatModule.createChannel(channelId, channelName, description, importance, true) } /** 현재 이 코드는 data가 아닌 notification에 맞는 코드만 작성 되어 있음 */val title = "${remoteMessage.notification?.title}" val message = "${remoteMessage.notification?.body}" val intent = Intent(this, ActivityProvider.mainActivity?.javaClass) intent.addFlags(Intent.FLAG_ACTIVITY_CLEAR_TOP) val pendingIntent = PendingIntent.getActivity(this, 0, intent, PendingIntent.FLAG_ONE_SHOT or PendingIntent.FLAG_IMMUTABLE) // notification 모듈과 연동 NotiCompatModule.createNotification(channelId, Constants.NOTIFICATION_ID, title, message, importance, pendingIntent) } } fun getFirebaseToken() { FirebaseMessaging.getInstance().token.addOnSuccessListener { Log.e("token", "FCM getFirebaseToken token=${it}") try { val var10000 = WaveInfoDBHelper(ActivityProvider.mainActivity, "deviceInfo.db", null as SQLiteDatabase.CursorFactory?, 1) var10000.putFcmToken(it) } catch (e: Exception) { e.printStackTrace() } } } }
메시지 전송
실제 구글 Firebase에서 메세지를 전송하여, 테스트한다.
아래와 같은 단계를 거쳐 사용자 편의에 맞게 메세지를 생성한다.
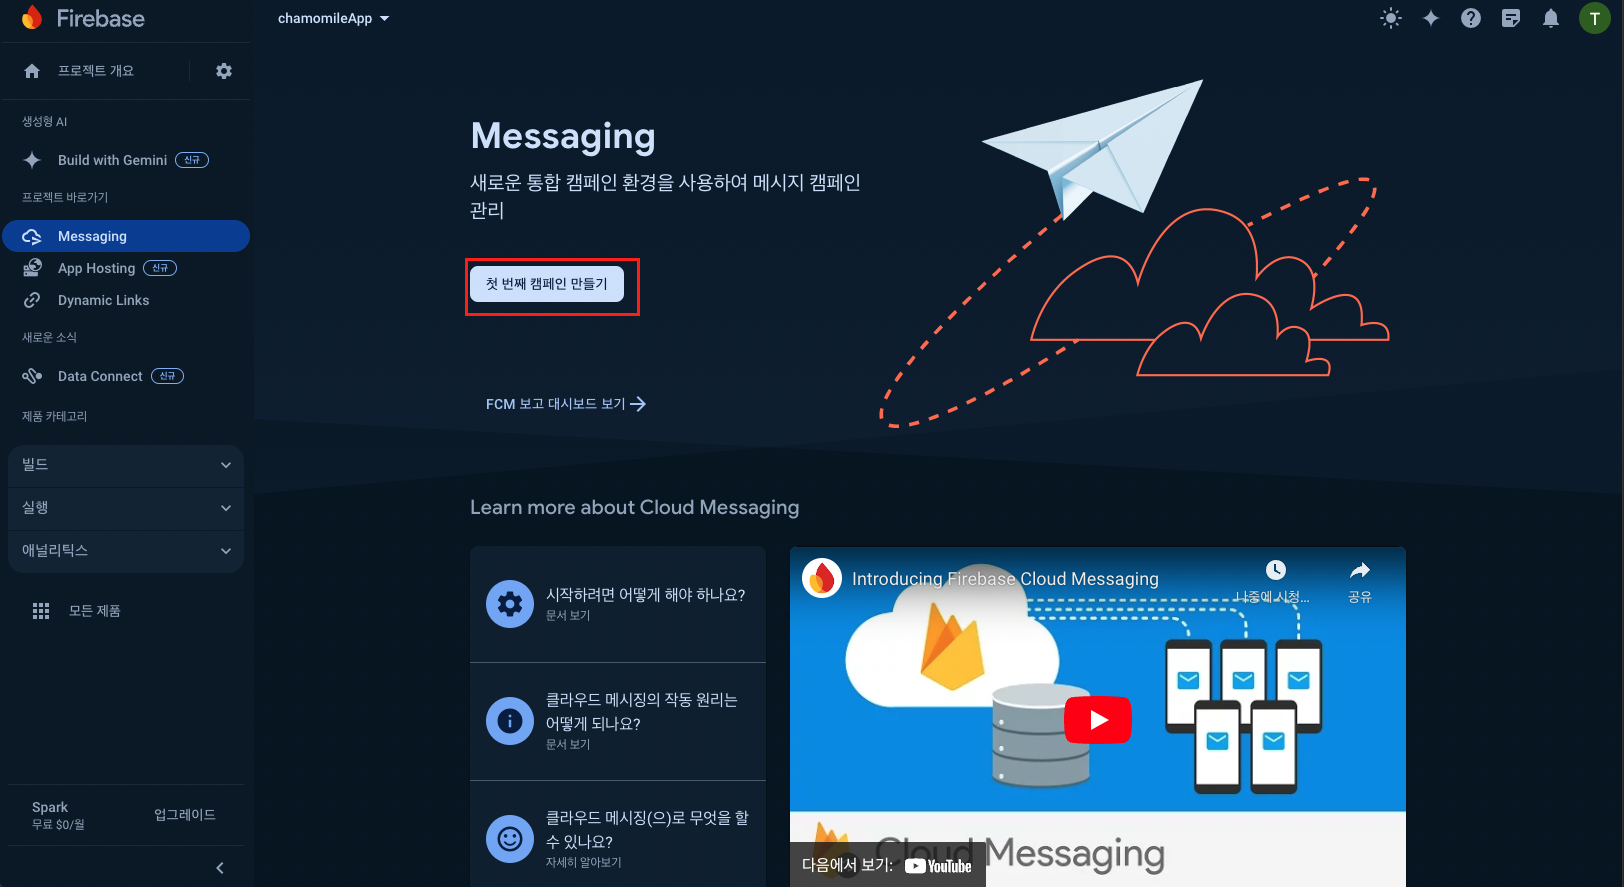
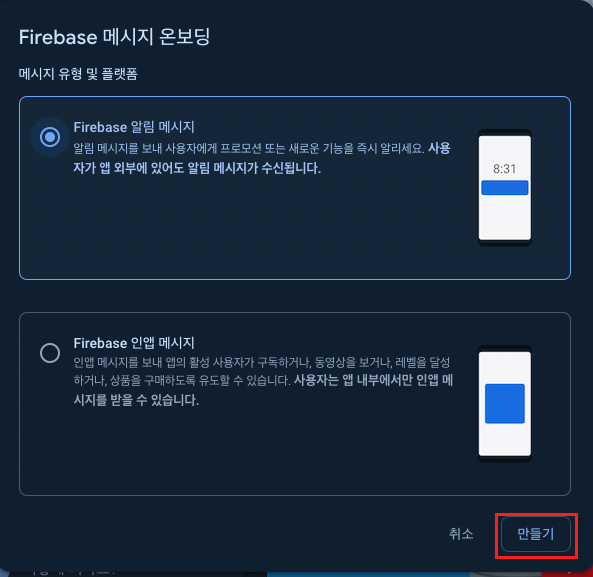
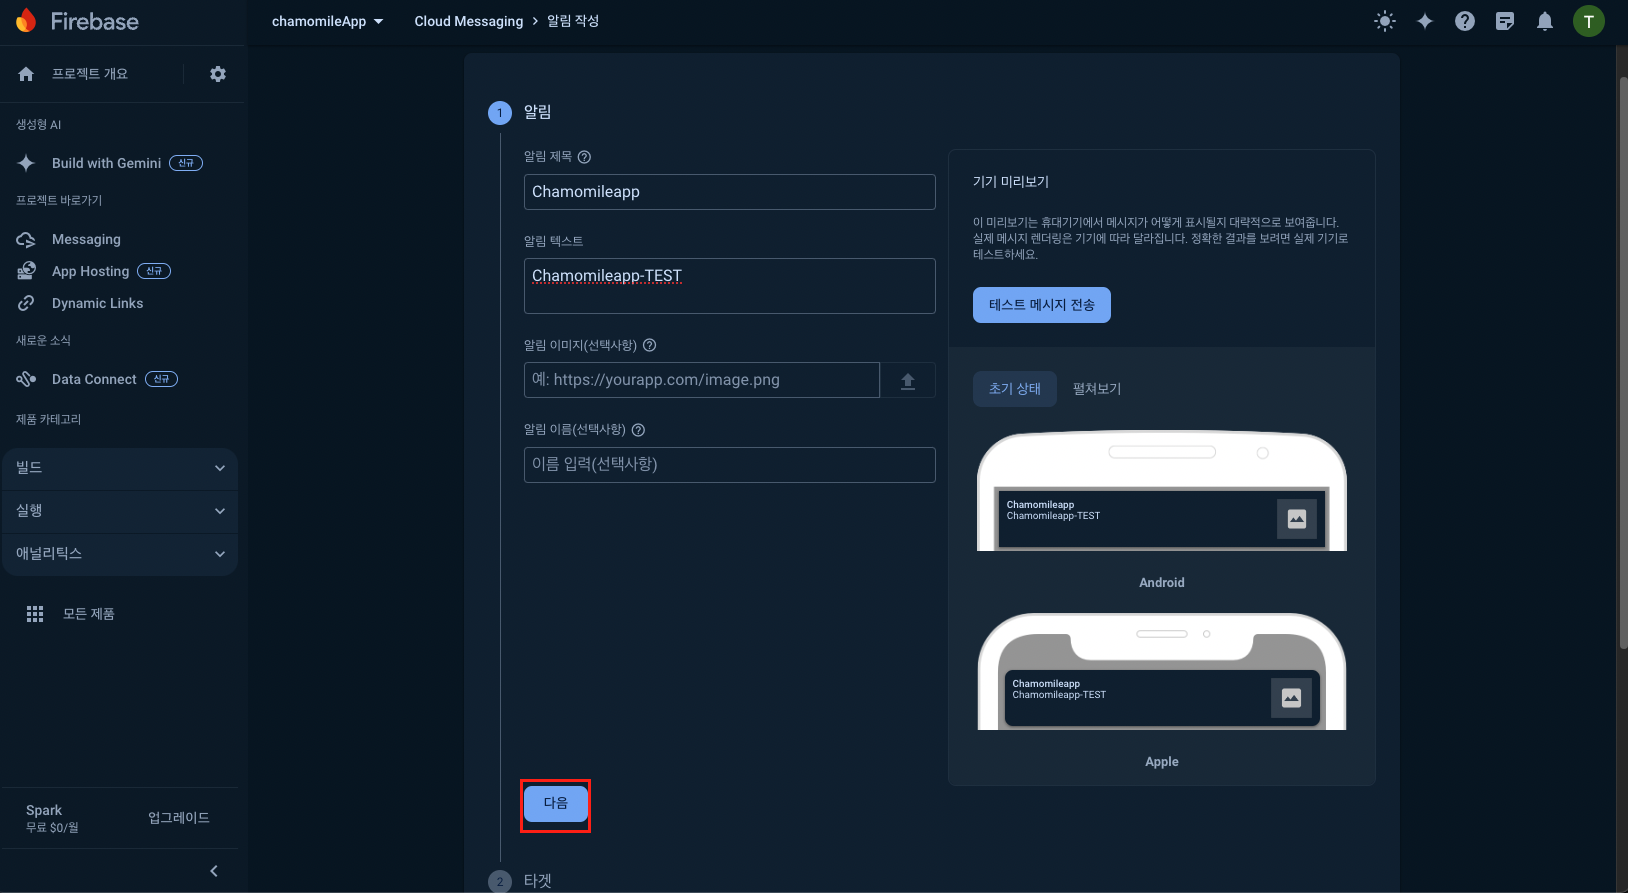
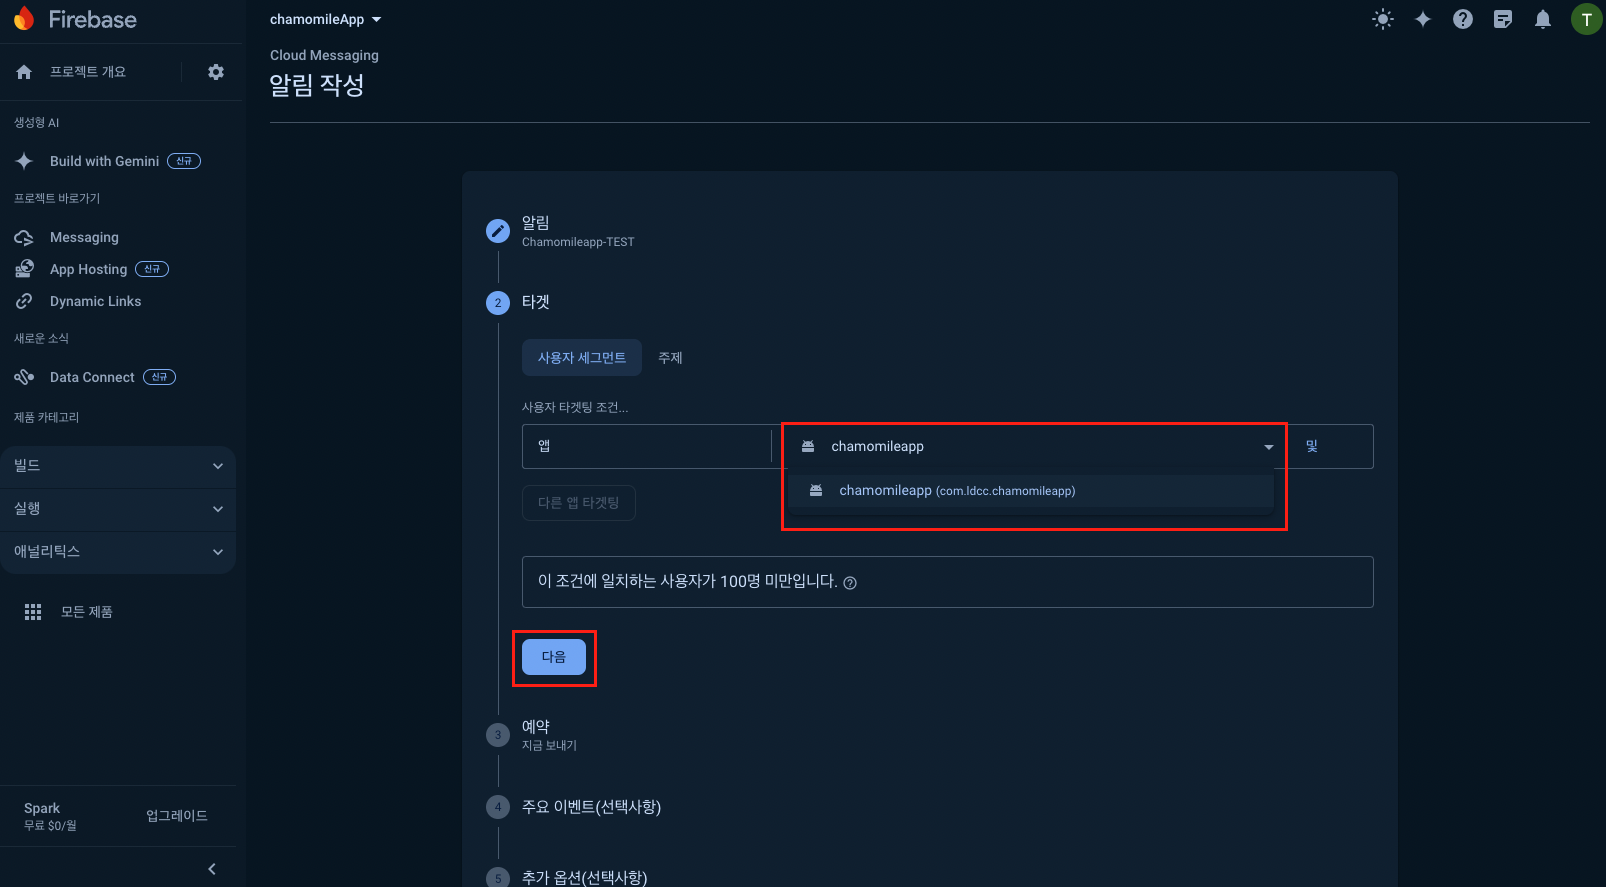
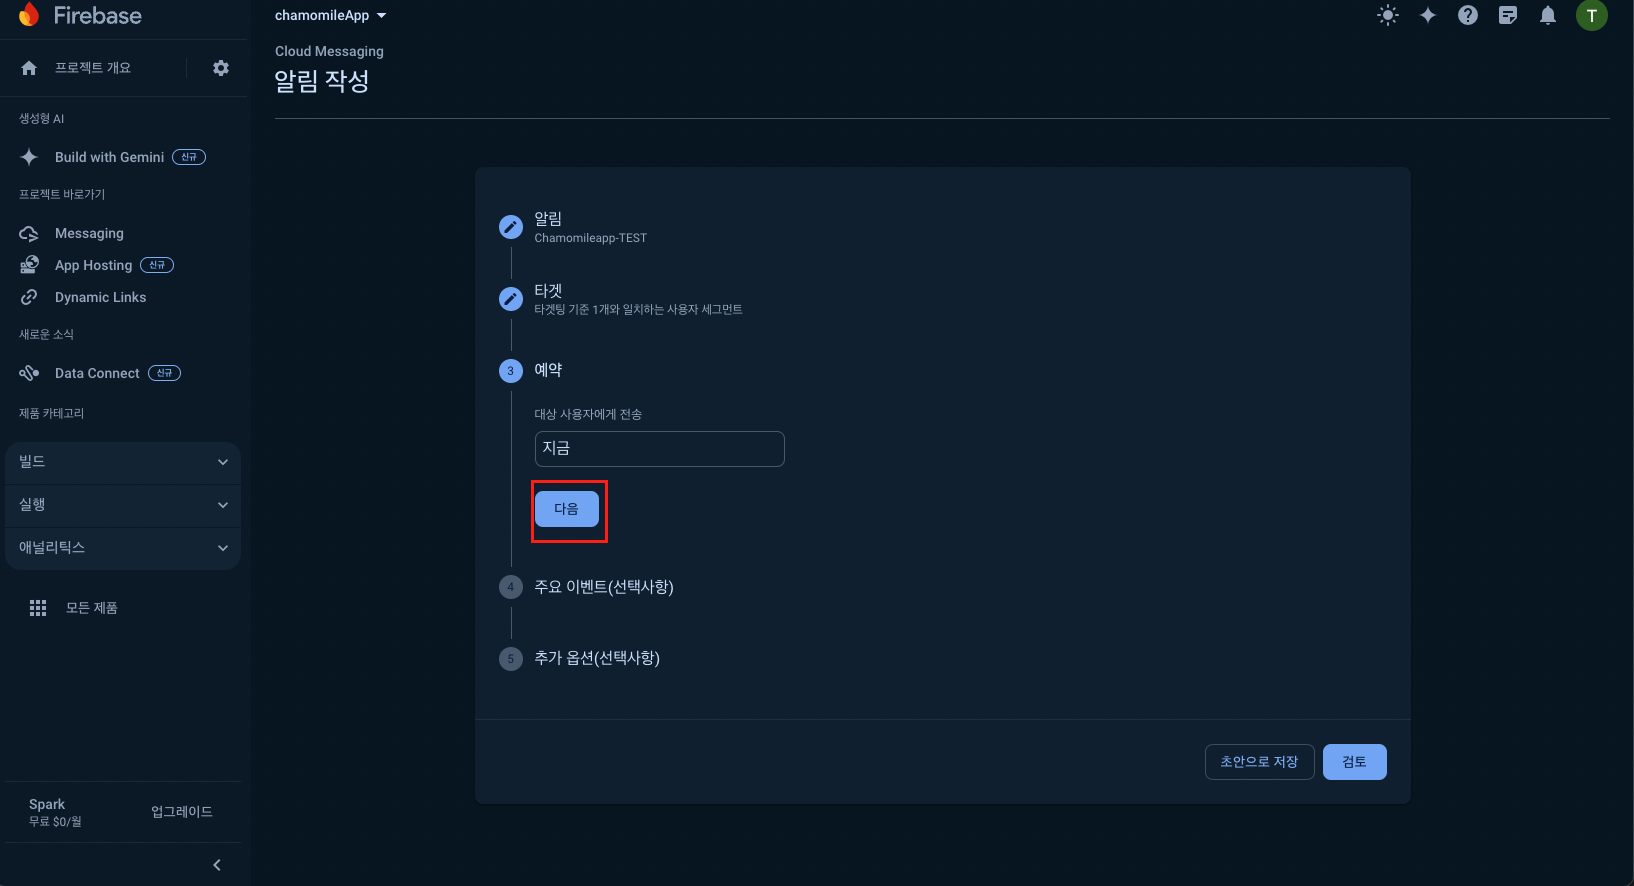

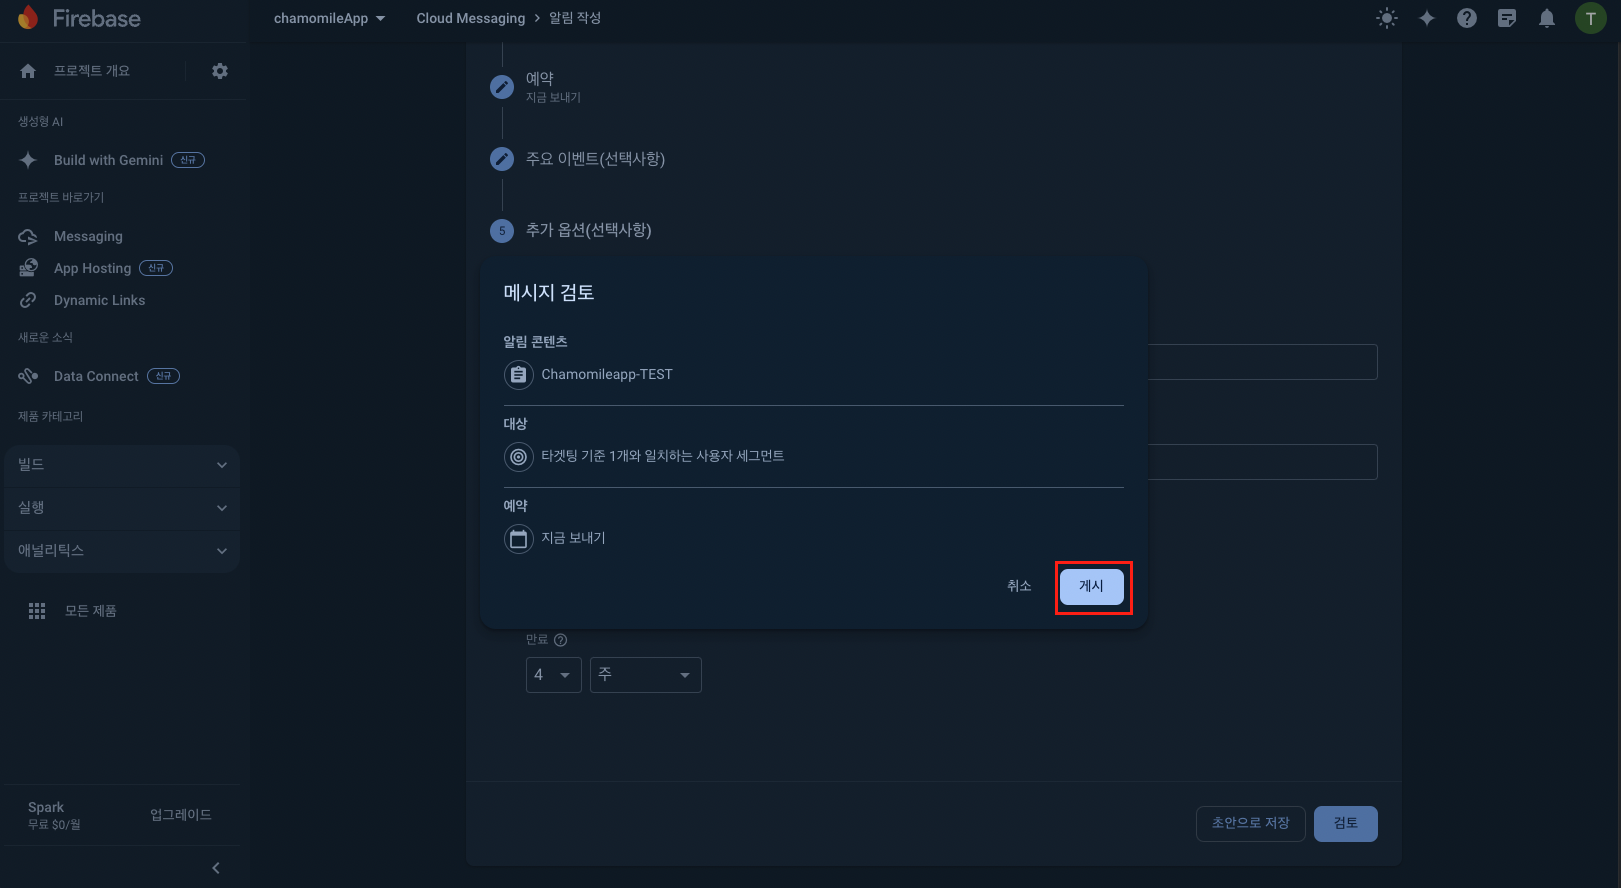
실행결과 확인
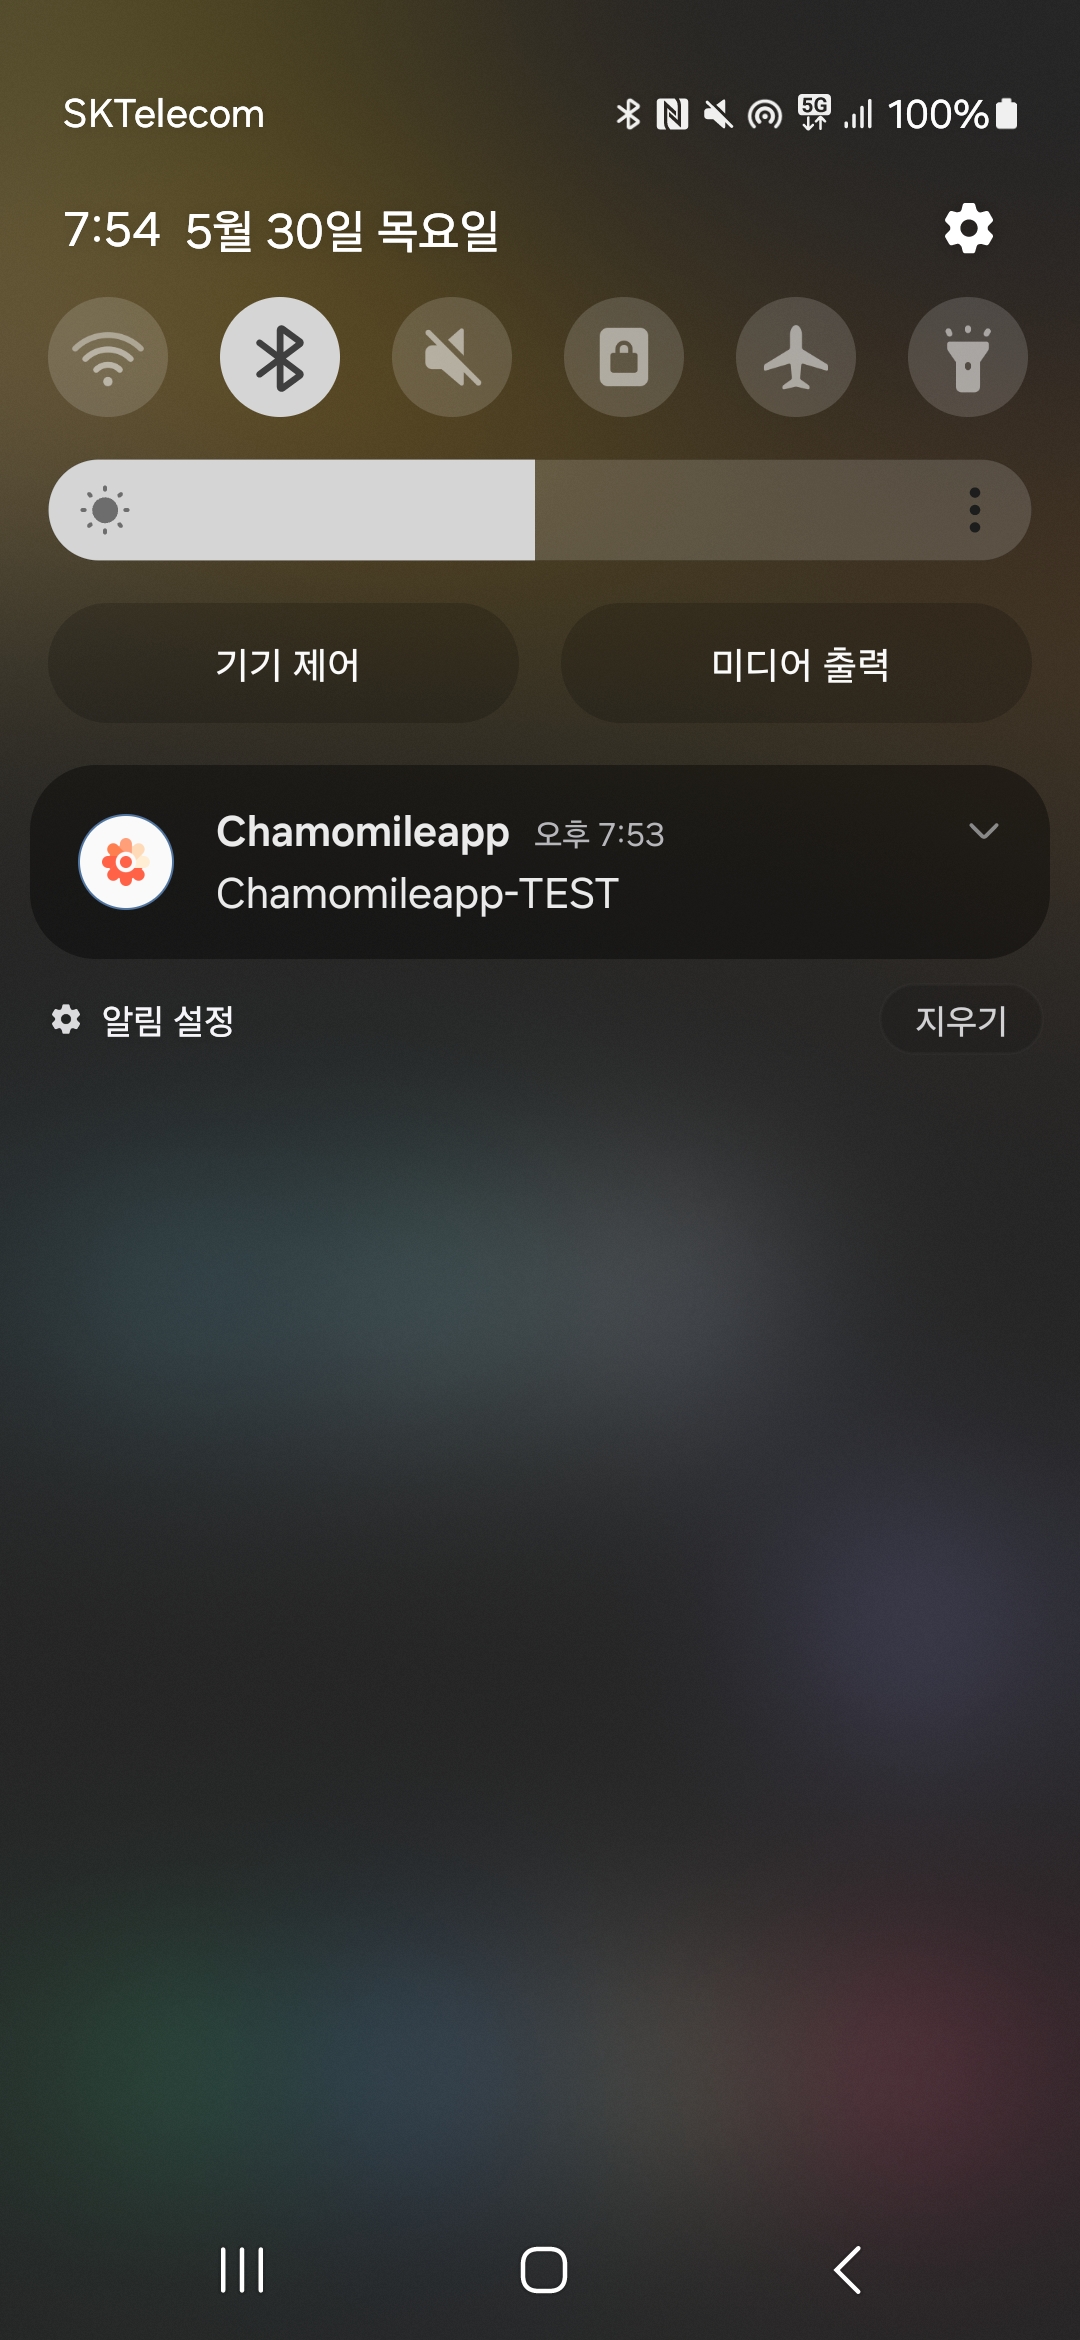
아래와 같이 알람메세지가 오고, 알람메세지를 클릭하면 앱으로 접속이 가능하다. 